Creating sci fi panels in Photoshop (PDF)
File information
Author: Owner
This PDF 1.5 document has been generated by Microsoft® Office Word 2007, and has been sent on pdf-archive.com on 31/05/2011 at 13:42, from IP address 90.206.x.x.
The current document download page has been viewed 2551 times.
File size: 588.44 KB (6 pages).
Privacy: public file


File preview
Creating sci fi panels in Photoshop - workflow
Part 1 – base metal
Create a document which is 1024x1024 pixels in size
Fill the background layer with a dark grey colour
Now use a random grunge brush that is slightly darker than the base
colour and paint over lightly at around 10-15% opacity. Remember you
can use layers masks to paint away the areas you don’t want so don’t
be too fussy.
Now repeat this step a few more times using different brushes while
using a very low opacity changing the brightness of the brush only
slightly.
Do the same again with but using a lighter grey than you background
and paint lightly over the image until you get something your satisfied
with.
repeat this step on different layers on a low opacity
Now find a scratch bush and start to overlay the scratches on a
separate layer
Repeat this step but with a different size brush to give some variation
to the size of your scratches.
Brushes can be found at: www.brusheezy.com or just by searching with Google
don’t forget that on each of these layers you can use layer masks and remove bit you don’t
want. If it looks bad then just play with the opacity of each layer until your happy.
Part 2 normal and fake ambient occlusion
I am going to use the nvidia Photoshop normal map plug-in which can be found here:
http://developer.nvidia.com/nvidia-texture-tools-adobe-photoshop
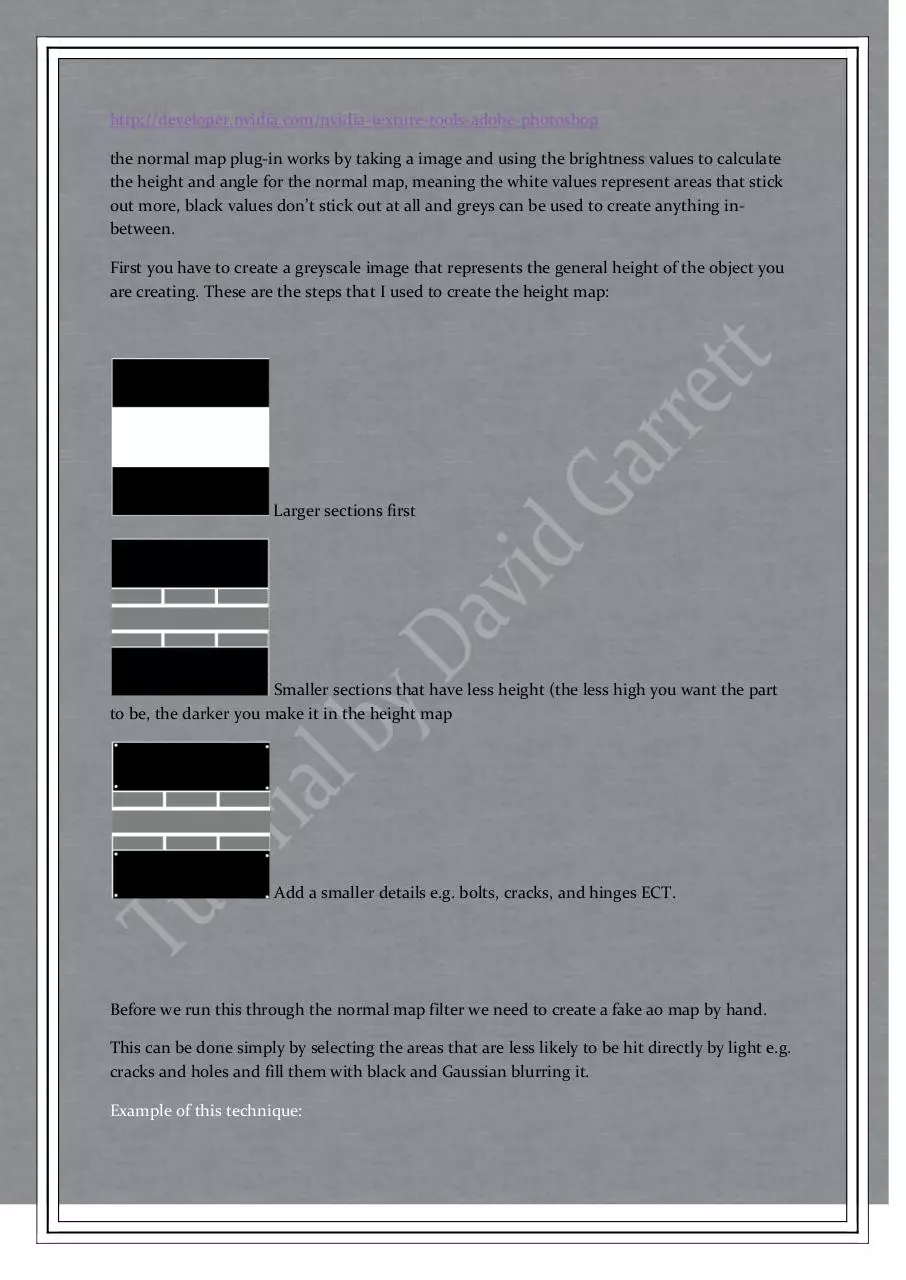
the normal map plug-in works by taking a image and using the brightness values to calculate
the height and angle for the normal map, meaning the white values represent areas that stick
out more, black values don’t stick out at all and greys can be used to create anything inbetween.
First you have to create a greyscale image that represents the general height of the object you
are creating. These are the steps that I used to create the height map:
Larger sections first
Smaller sections that have less height (the less high you want the part
to be, the darker you make it in the height map
Add a smaller details e.g. bolts, cracks, and hinges ECT.
Before we run this through the normal map filter we need to create a fake ao map by hand.
This can be done simply by selecting the areas that are less likely to be hit directly by light e.g.
cracks and holes and fill them with black and Gaussian blurring it.
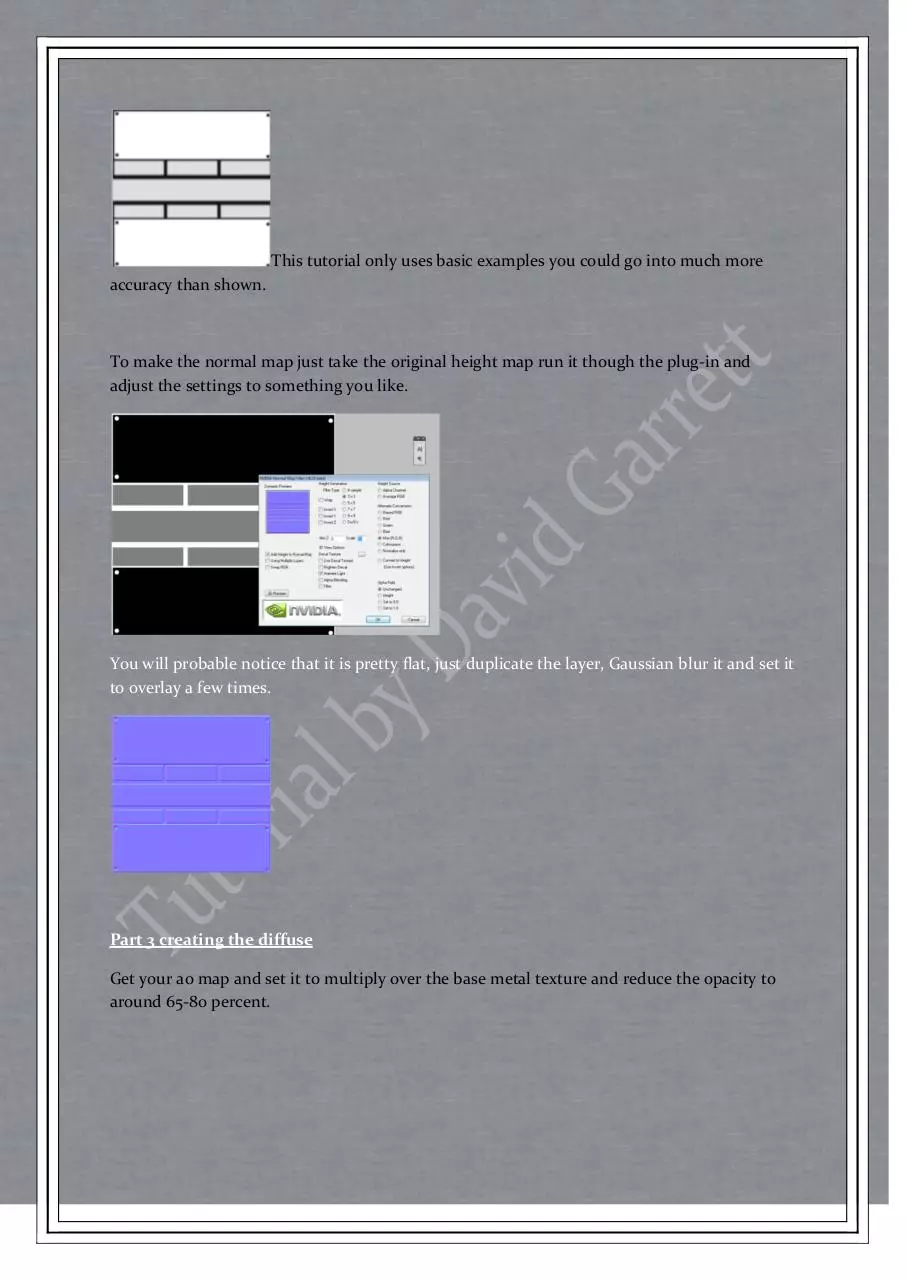
Example of this technique:
This tutorial only uses basic examples you could go into much more
accuracy than shown.
To make the normal map just take the original height map run it though the plug-in and
adjust the settings to something you like.
You will probable notice that it is pretty flat, just duplicate the layer, Gaussian blur it and set it
to overlay a few times.
Part 3 creating the diffuse
Get your ao map and set it to multiply over the base metal texture and reduce the opacity to
around 65-80 percent.
Now take your normal map and under the channels option uncheck red and green and copy
the blue channel onto a new layer. Now make sure all your channels are visible again and take
your new layer which should look similar to this:
Now invert it by pressing ctrl + I and set it to screen and reduce the opacity to around 35-45
percent. This has now created edge detection. you can also create a mask and remove parts
that show up to much.
Now create a new layer fill it with white, created a new mask, invert the mask.
You should have a layer that is invisible, now paint with a white scratch bush onto the mask
around the edges and corners most likely to get damaged. Reduce the layer opacity down to a
level that isn’t too intense around 25%.
Adding Paint
Now simply select the areas you want to have paint on and fill with a solid colour and set it to
colour (at the bottom of the list with multiply, overlay ECT.)
Now to create some wear and tear using the magic wand tool and selecting the base metal
with a tolerance of around 12/13 (anything that selects small parts of the image without
selecting too much paint) it should have selected most of the image but not all, now select the
paint layer and create a mask.
Final result:
at the end of every diffuse you make add an adjustment levels layer to correct the brightness
of your image.
Other examples using this technique:
Download Creating sci fi panels in Photoshop
Creating sci fi panels in Photoshop.pdf (PDF, 588.44 KB)
Download PDF
Share this file on social networks
Link to this page
Permanent link
Use the permanent link to the download page to share your document on Facebook, Twitter, LinkedIn, or directly with a contact by e-Mail, Messenger, Whatsapp, Line..
Short link
Use the short link to share your document on Twitter or by text message (SMS)
HTML Code
Copy the following HTML code to share your document on a Website or Blog
QR Code to this page

This file has been shared publicly by a user of PDF Archive.
Document ID: 0000031134.