Snakewhip 1 (PDF)
File information
Title: Microsoft Word - Nulon Snakewhip Tut.doc
Author: towmar
This PDF 1.4 document has been generated by PScript5.dll Version 5.2.2 / GPL Ghostscript 8.15, and has been sent on pdf-archive.com on 02/01/2014 at 00:18, from IP address 93.104.x.x.
The current document download page has been viewed 756 times.
File size: 1.2 MB (4 pages).
Privacy: public file


File preview
NYLON SNAKEWHIP TUTORIAL
What we are making here is a 4 foot 12 plait nylon
snakewhip, there are only two small differences if you
would rather make a Bullwhip, but I will tell you about
those at the end.
What you see in the picture is some 3.4mm ball chain
(you can buy this on ebay) and some 650 paracord. (I
buy mine from UBraidIt). First thing to do is decore the
paracord, you can see in the picture where I have started to do this, it’s the white
core coming out of the red.
Cut three lengths of ball chain, one at 32in, one at 22in and one at 12in…..
Tie a short piece of artificial sinew round the last ball on
the chain, thread the other end through a #20 darning
needle, and now you are ready to start feeding your
chain into your cord to form your core.
Run a lighter over the end of your parcord till it starts to
melt then force a fid into it to make a nice opening. If
you don’t do this when you start to feed the ball chain
in, the cord will fray and you will get in a real pickle.
Now push the needle up into the paracord and just
shunt it along dragging it as you go, just be careful to
go easy til you get a few inches in, after that it just
glides on in.
Once you have pulled the chain fully into the core, bring
the needle through, unthread it and with the sinew in
your hand put a hitch round the last ball to hold it in
place. At the other end cut the cord off around an inch
after the ball chain finishes.
You can see here I am holding all three together and
am about to bind them all together, again using artificial
sinew.
You can see here the first two inches I have bound tight,
after that just wrap your sinew round going diagonally
downwards til you get to a spot a couple of inches before
your shortest length of ball chain ends, then come back on
yourself and go diagonally upwards. Do not try and do this
bit tight or it will mis-shape your core and that will follow
through each layer, all your doing is holding them together
to make it easy to plait over.
DO NOT AT THIS STAGE BE TEMPTED TO USE TAPE.
The belly is an 8 plait so tie yourself 8 strings on above
the end of your core as shown in the picture, you are
going to take this belly to just a little over 3 foot, so you
will want to cut your strings 6 foot long, this is alittle too
long but better to waste alittle cord which is really cheap
than get near the end and find you haven’t got enough.
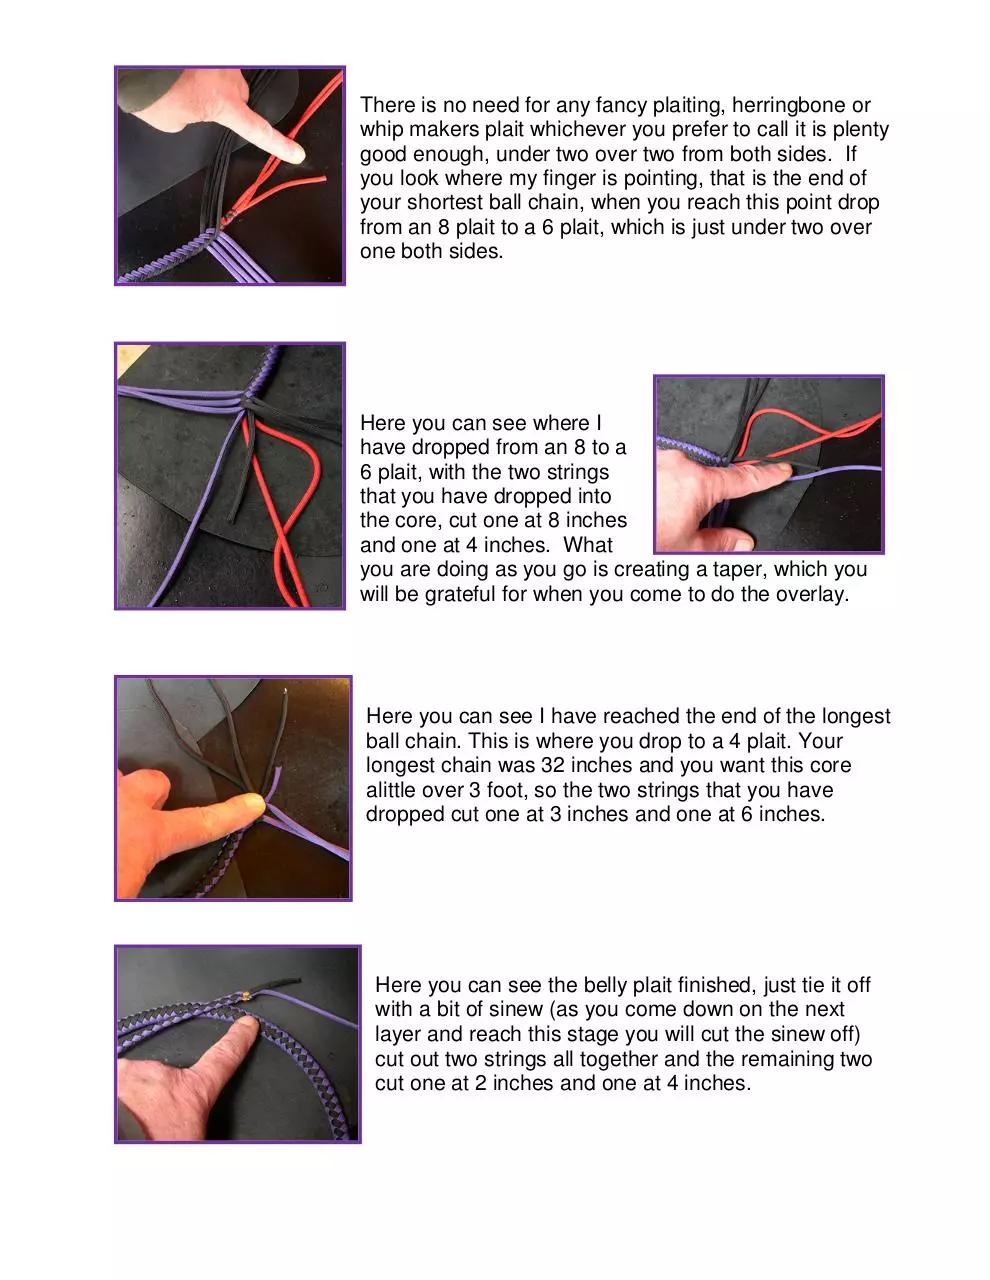
There is no need for any fancy plaiting, herringbone or
whip makers plait whichever you prefer to call it is plenty
good enough, under two over two from both sides. If
you look where my finger is pointing, that is the end of
your shortest ball chain, when you reach this point drop
from an 8 plait to a 6 plait, which is just under two over
one both sides.
Here you can see where I
have dropped from an 8 to a
6 plait, with the two strings
that you have dropped into
the core, cut one at 8 inches
and one at 4 inches. What
you are doing as you go is creating a taper, which you
will be grateful for when you come to do the overlay.
Here you can see I have reached the end of the longest
ball chain. This is where you drop to a 4 plait. Your
longest chain was 32 inches and you want this core
alittle over 3 foot, so the two strings that you have
dropped cut one at 3 inches and one at 6 inches.
Here you can see the belly plait finished, just tie it off
with a bit of sinew (as you come down on the next
layer and reach this stage you will cut the sinew off)
cut out two strings all together and the remaining two
cut one at 2 inches and one at 4 inches.
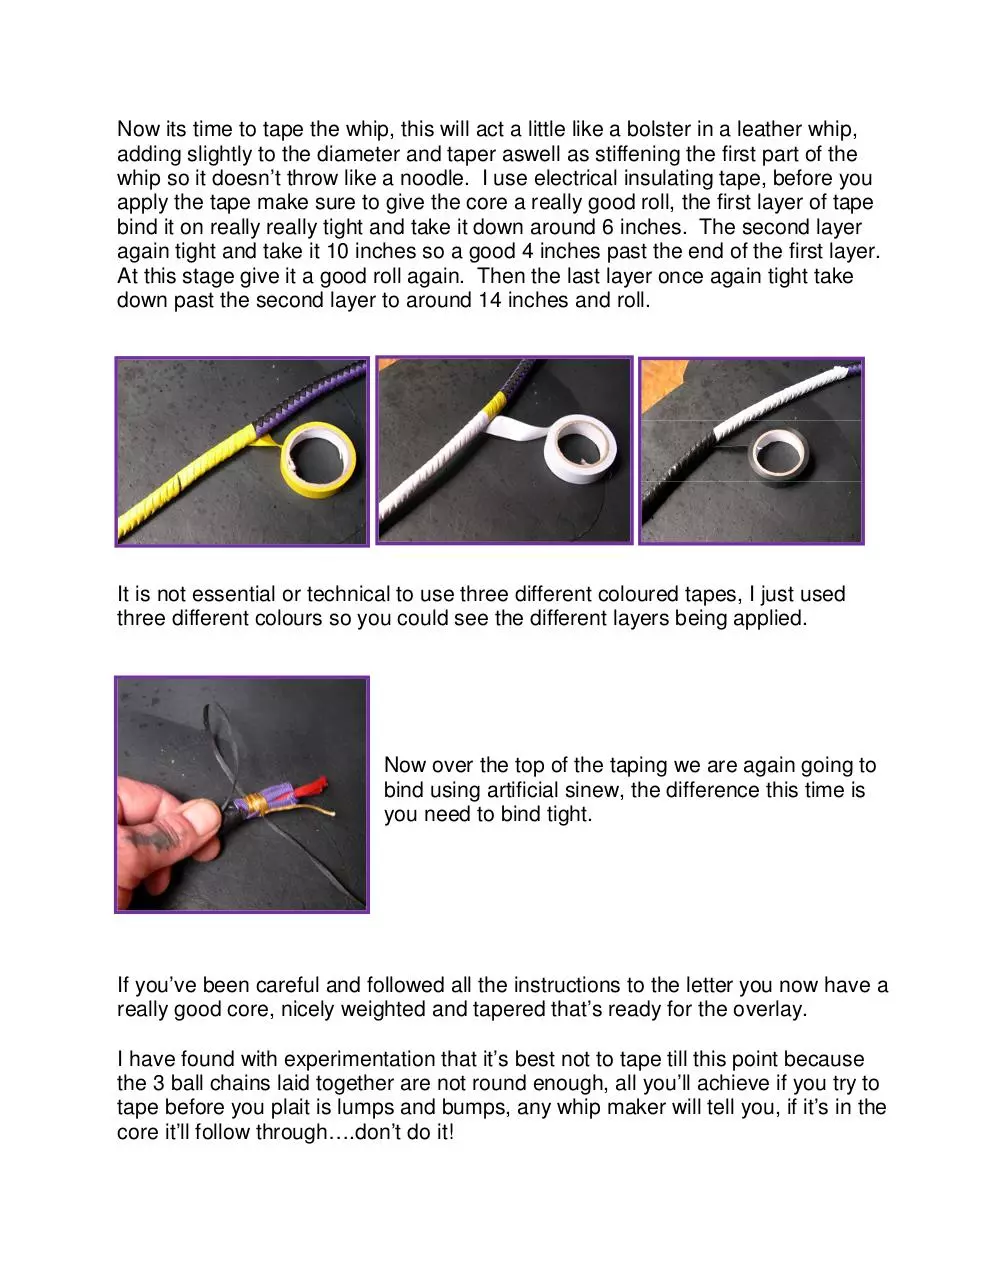
Now its time to tape the whip, this will act a little like a bolster in a leather whip,
adding slightly to the diameter and taper aswell as stiffening the first part of the
whip so it doesn’t throw like a noodle. I use electrical insulating tape, before you
apply the tape make sure to give the core a really good roll, the first layer of tape
bind it on really really tight and take it down around 6 inches. The second layer
again tight and take it 10 inches so a good 4 inches past the end of the first layer.
At this stage give it a good roll again. Then the last layer once again tight take
down past the second layer to around 14 inches and roll.
It is not essential or technical to use three different coloured tapes, I just used
three different colours so you could see the different layers being applied.
Now over the top of the taping we are again going to
bind using artificial sinew, the difference this time is
you need to bind tight.
If you’ve been careful and followed all the instructions to the letter you now have a
really good core, nicely weighted and tapered that’s ready for the overlay.
I have found with experimentation that it’s best not to tape till this point because
the 3 ball chains laid together are not round enough, all you’ll achieve if you try to
tape before you plait is lumps and bumps, any whip maker will tell you, if it’s in the
core it’ll follow through….don’t do it!
Download Snakewhip 1
Snakewhip_1.pdf (PDF, 1.2 MB)
Download PDF
Share this file on social networks
Link to this page
Permanent link
Use the permanent link to the download page to share your document on Facebook, Twitter, LinkedIn, or directly with a contact by e-Mail, Messenger, Whatsapp, Line..
Short link
Use the short link to share your document on Twitter or by text message (SMS)
HTML Code
Copy the following HTML code to share your document on a Website or Blog
QR Code to this page

This file has been shared publicly by a user of PDF Archive.
Document ID: 0000140499.