Homework 1 Instructions (PDF)
File information
Author: Preston Hanisko
This PDF 1.5 document has been generated by Microsoft® Word 2013, and has been sent on pdf-archive.com on 12/03/2015 at 04:44, from IP address 97.77.x.x.
The current document download page has been viewed 1136 times.
File size: 1.13 MB (10 pages).
Privacy: public file


File preview
Homework 1 Instructions
Creating a WordPress Site
Part 1: Registering a Domain
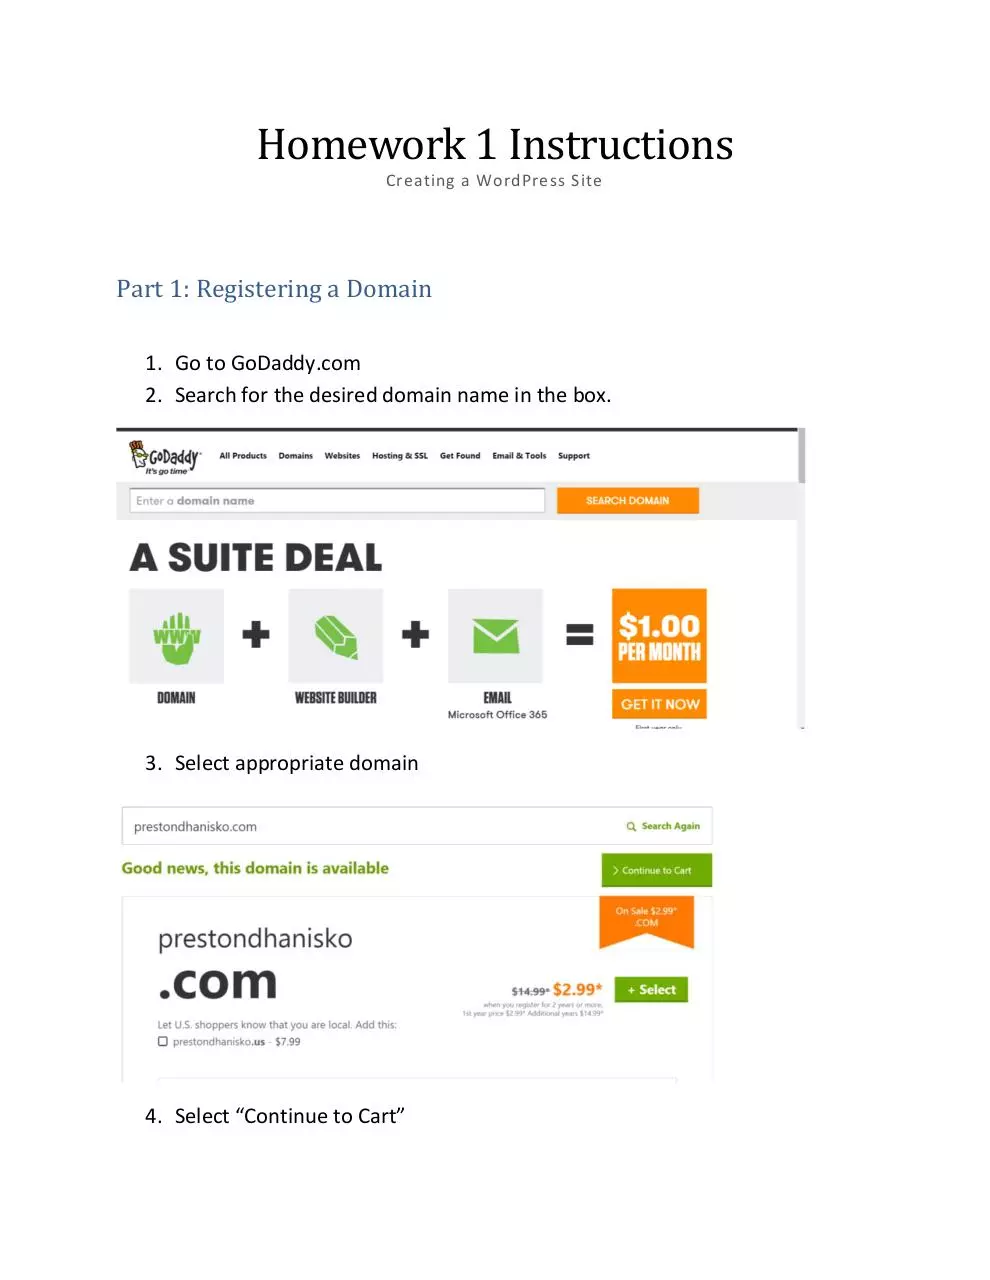
1. Go to GoDaddy.com
2. Search for the desired domain name in the box.
3. Select appropriate domain
4. Select “Continue to Cart”
a. Say “no thanks” on step 1 to protect your information (unless you
want to spend the extra $$$)
b. On Step 2: Options, Select “Hosting”
i. On the drop down, select “Economy”
5.
6.
7.
8.
c. On Step 3: Email, select “No Thanks” unless you want to have an
email at your own domain (i.e info@prestonhanisko.com)
Click Continue to Checkout
Select the Term as 1 Year (should come out to around $12.99)
On Economy Linux Hosting with cPanel, select “Linux” and select the per
month term for $6.99.
Finish checking out by registering for a new account, or use your existing
one, if applicable.
Part 2 Setting up WordPress
Once you have finished purchasing your domain and website hosting, you will then have access to your
Hosting Details. This is where you can install WordPress and begin building your custom website for all
the world to see.
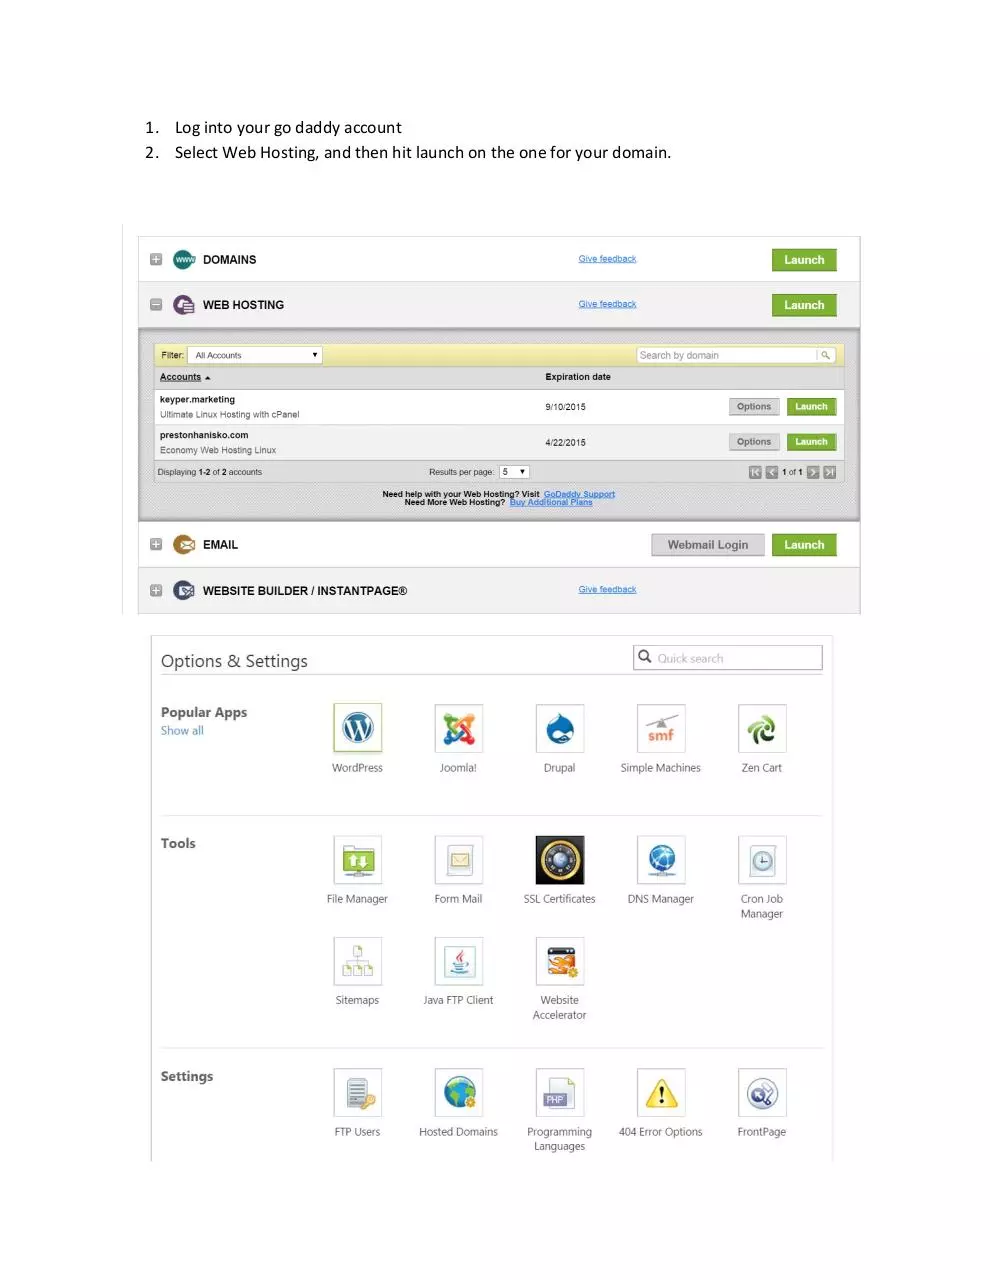
1. Log into your go daddy account
2. Select Web Hosting, and then hit launch on the one for your domain.
3. Install WordPress
a. Click the WordPress Icon under Options & Settings in Popular Apps section
b. Click “Install Now” on the WordPress App Page
c. Follow Instructions for the Installation
d. Write down your database name/user name & password for safe keeping
e. Choose Install Directory
i. This should be blank so it installs to your root directory
1. If this is a site you already have WordPress or something similar
installed on the root directory, then pick a directory of your choosing
(i.e WordPress)
f. Select Admin name, password, email and a title for your blog
i. This will be used each time you log into your WordPress site
g. Select Finish
Part 3: Building Your Website
So now you have a domain to call your own, hosting to store data and information, and WordPress to
bring your site to life with content, media & e-commerce. Now it’s time to dive in and customize your
website that shows off your skills, personality & knowledge on topics that matter to you.
1. Login to WordPress
a. Go to www.yourdomainname.com/wp-admin
b. Use the Admin name and password you created in Part 2 to sign into your dashboard
i. Once signed in, it should look like so…
2. Change Permalink Structure
a. On the left hand side, go to settings.
b. Click on “Permalinks”
c. Select the option for “Post Name” & Hit “Save Changes”
3. Add Top Level Pages
a. Select Pages on the left hand side and select “Add New”
b. Select the title “Home” and click “Publish”
c. Also Create the following pages:
i. “About Me”
ii. “Skills” or “Services”
iii. “Buy Now”
iv. “Contact”
v. “Blog”
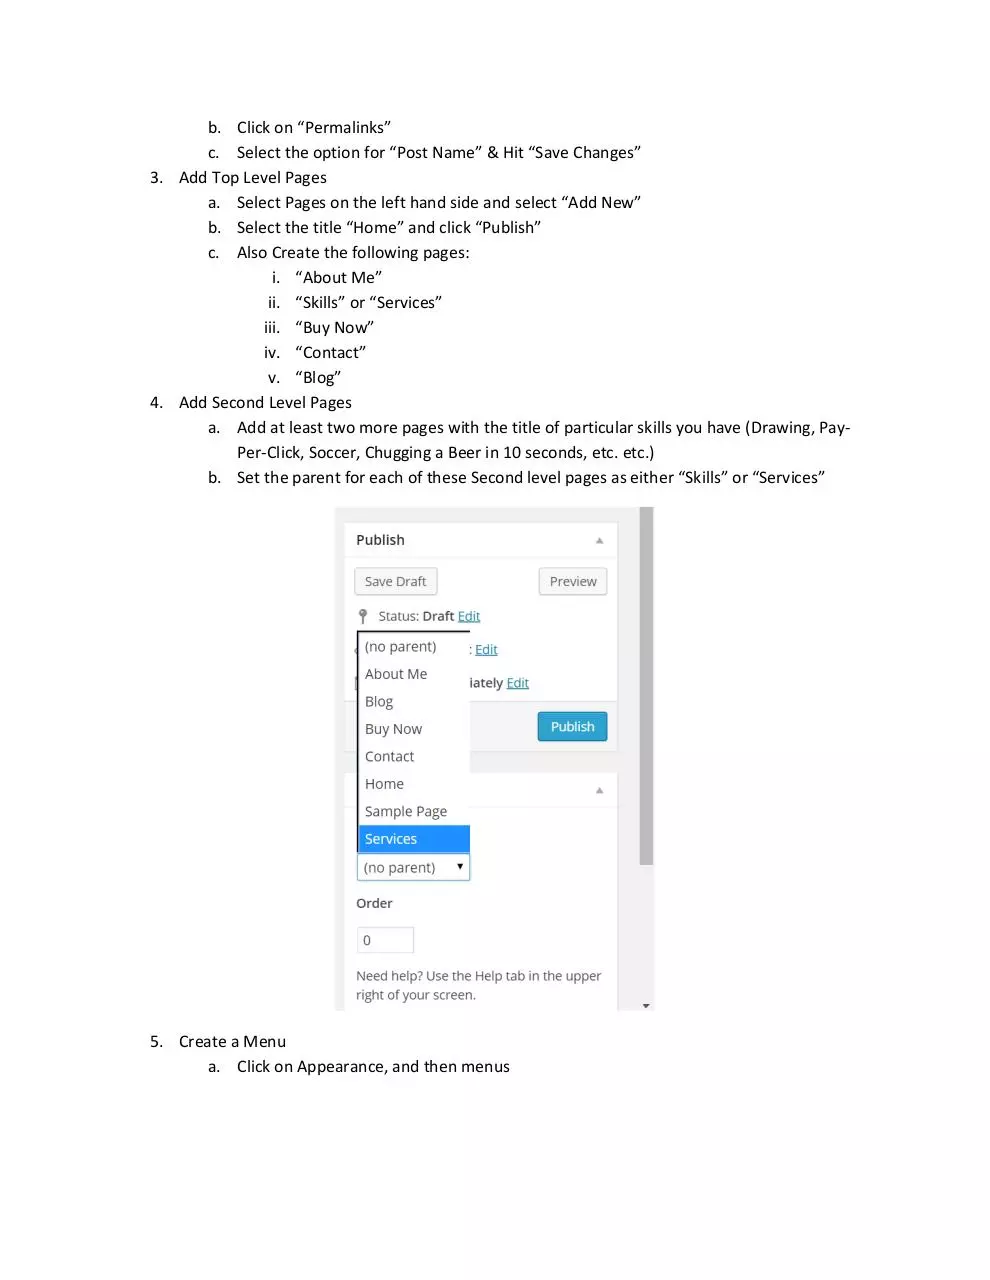
4. Add Second Level Pages
a. Add at least two more pages with the title of particular skills you have (Drawing, PayPer-Click, Soccer, Chugging a Beer in 10 seconds, etc. etc.)
b. Set the parent for each of these Second level pages as either “Skills” or “Services”
5. Create a Menu
a. Click on Appearance, and then menus
b. Click create a new menu
i. Add all pages you just created under the menu
ii. Put the 2nd Level Pages under skills/services as sub items
iii. Under the Theme Locations, select “Primary Menu”
iv. Save the menu
Part 4: Customization & Personalization
Now that we have the structure of the site set-up, here is your chance to get creative and make this
domain your own. In this section you can change your themes, change background pictures, customize
the titles and subheadings of your home page, and customize your layouts as well.
1. Change your theme (optional)
a. Go to appearance themes add new
b. Select a theme of your choosing (Arcade Basic is a good example)
2. Customize your theme.
a. Go to appearance customize
b. Go through each of the sidebar selections and customize each setting. Depending on
the theme you chose, some sections might be different.
i. Title & Tagline
ii. Colors
iii. Header Image
iv. Navigation set as the menu we created
3. Add Content
a. Write a paragraph, add some type of media, and set a featured image for the following
Pages…
i. Home
ii. About Me
iii. Each “Service” or “Skill” page
b. Write a quick blog “post” (Select posts on left hand side and select add new) on a digital
marketing topic of your choosing (PPC, SEO, etc). Should be around 500 words with a
picture.
4. Add Contact Form
a. Go to Plugins Add New Search “NEX-Forms” Click “Install Now”
b. After the plugin installs, select “activate”
c. This will now be on your left hand side, go ahead and click it.
d. Click “use express version” when it loads
e. Create a form using the following fields:
i. First Name
ii. Last Name
iii. E-Mail Address
iv. Message
f. Save form in the name of your choosing
g. Add Form to “Contact” Page
i. Go to pages all pages Contact
ii. In the content window, click on the NEX Form Blue Icon
iii. Select the Form you just saved and insert into the post
iv. Select “update” to save your changes
Part 5: E-Commerce Shop
Now that we have a fully functioning website, it’s time to get you paid! So you are going to be setting up
a quick e-commerce platform so visitors can quickly purchase any type of service or product you want to
offer.
1. Install WooCommerce
a. Go to Plugins Add New Search “woocommerce” Click “Install Now”
b. Upon Installation, select “activate now”
c. You will also be prompted to add WooCommerce page. Go ahead and select that
option.
2. Add Products/Services
a. On the left hand side, select products add product.
b. Create at least 2 products. Must include…
i. Quick Description
ii. Featured Image
iii. SKU Number
3. Select “Buy Now” page as default e-commerce page
a. Go to WooCommerce Settings
b. Go to the products tab
i. On “Product Archive / Shop Page” Select the “Buy Now” Page we created
earlier.
Submitting Your Homework
Create a Word Document that has the following
Web URL
Screenshot of Home Page
Screenshot of Contact Page
Screenshot of Commerce Page (Buy Now)
Screenshot of Your WordPress Dashboard
Save the document in the following format
“Last Name, First Name – Homework 1.docx”
Upload to eLearning by 7:00 PM CST 1/30/2015
Download Homework 1 Instructions
Homework 1 Instructions.pdf (PDF, 1.13 MB)
Download PDF
Share this file on social networks
Link to this page
Permanent link
Use the permanent link to the download page to share your document on Facebook, Twitter, LinkedIn, or directly with a contact by e-Mail, Messenger, Whatsapp, Line..
Short link
Use the short link to share your document on Twitter or by text message (SMS)
HTML Code
Copy the following HTML code to share your document on a Website or Blog
QR Code to this page

This file has been shared publicly by a user of PDF Archive.
Document ID: 0000214501.