DVR Manual (PDF)
File information
Title: XB Manual
Author: Kanshine Lee
This PDF 1.5 document has been generated by CorelDRAW / Corel PDF Engine Version 14.0.0.653, and has been sent on pdf-archive.com on 24/08/2016 at 23:38, from IP address 205.206.x.x.
The current document download page has been viewed 701 times.
File size: 847.58 KB (12 pages).
Privacy: public file


File preview
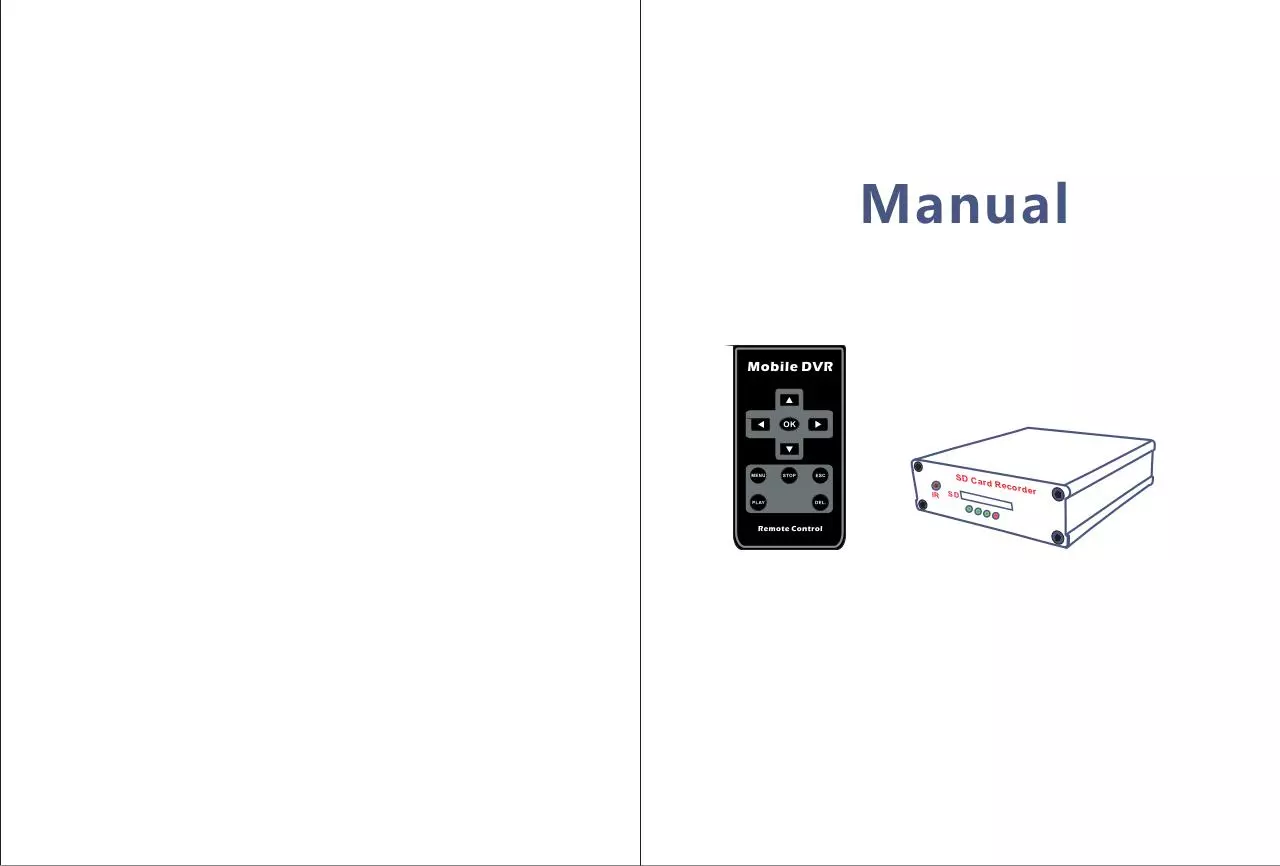
Manual
S D C ar
IR
SD
d R ec
or de r
Manual
使用说明书
Manual
Contents
Attention!
Attention
1
Accessories
1
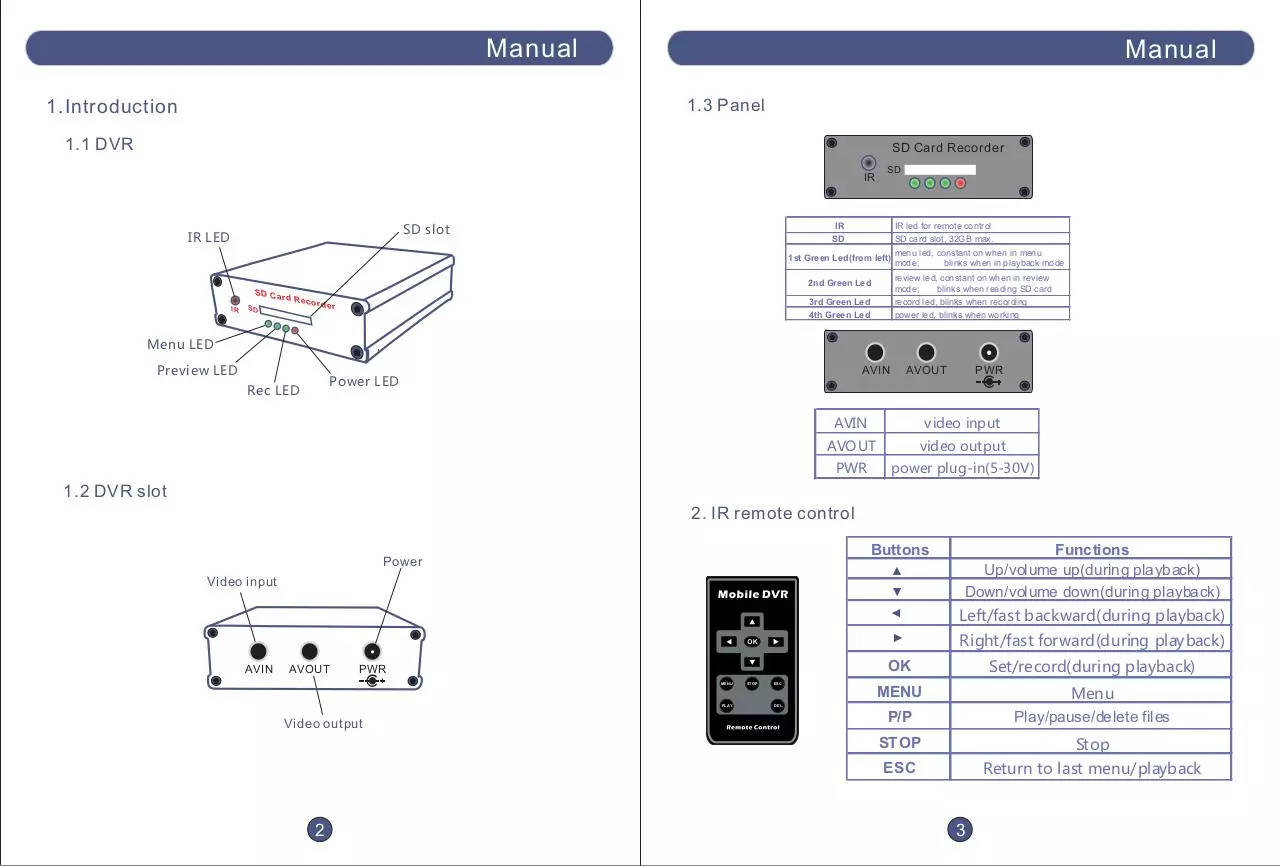
1. Introduction
1.1 DVR
1.2 DVR slot
1.3 Panel
2
2
3
2. IR remote control
3
3. Insert the SD card
4
4. AV cables, power cable connection
4
5. Screen icons instruction
5
1. Don’t take SD card out when DVR is working
2. Use original power cable and AV cables
3. Format SD card by DVR system on your first use
4. Install the unit in dry and ventilatory environment
5. Use genuine SD card
6. Warranty and free maintenance will be invalidated if you disassemble
the unit
Description
Welcome to use our product!
This DVR unit is designed for in-vehicle security surveillance, with
IR remote to control the unit; SD CARD for data storage is shockproof
on vehicles and enables easy playback.
6. Setting
6.1 Operating DVR with IR remote control
6.2 Image setting
6.3 Recording setting
6.4 Recording mode setting
6.5 Playback and delete video files
6.6 System setting
7. F. A. Q.
6
7
9
15
16
18
Accessories
21
User Manual
Remote control
Power cable
AV cable
1
Power adapter
Manual
Manual
使用说明书
Manual
1.3 Panel
1.Introduction
1.1 DVR
SD Card Recorder
IR
SD slot
IR LED
SD
IR
IR led for remote control
SD
SD card slot, 32GB max.
1st Green Led(from left)
review led, constant on when in review
mode;
blinks when reading SD card
record led, blinks when recording
power led, blinks when working
2nd Green Led
S D C ar
IR
d R ec
SD
3rd Green Led
4th Green Led
or de r
menu led, constant on when in menu
mode;
blinks when in playback mode
Menu LED
Preview LED
AVIN
Power LED
Rec LED
PWR
AVOUT
AVIN
video input
AVOUT
video output
PWR
power plug-in(5-30V)
1.2 DVR slot
PWR
MENU
PLAY
Video output
2
▲
AVOUT
Left/fast backward(during playback)
Right/fast forward(during playback)
▲
Video input
AVIN
Functions
Up/volume up(during playback)
Down/volume down(during playback)
▲
Buttons
Power
▲
2. IR remote control
STOP
ESC
OK
Set/record(during playback)
MENU
Menu
Play/pause/delete files
DEL.
P/P
STOP
Stop
ESC
Return to last menu/playback
3
Manual
使用说明书
Manual
5. Screen icons instruction
3.Insert the SD card
5.1 Standby mode
*The following pictures are for references only
S D C ar
IR
d R ec
SD
or de r
Local date & time
Under video mode
2010/10/24 19:25:47
32 GB
SD
SD 卡
Reading SD card
SD Card Init.
4.AV cables, power cable connection
SD card inserted
00:47:40
Detecting
SD
DVR is working under
motion detection mode
AVIN
Recording time remaining
(approx.)
PWR
AVOUT
5.2 Recording mode
Recording time
00:00:33
No SD card detected
Camera
!
LCD
Insert SD card
Local date & time
DVR is recording
Note: please connect all cables correctly, in case of system failure.
4
REC
2010/10/24 19:25:47
5
Manual
使用说明书
Manual
6.Set up
6.2 Image setting
* You need to connect the DVR with TV or monitor before set-up
6.2.1 Image quality
SET UP
6.1 Operating DVR with IR remote control
Image Setting
REC. Setting
Buttons
▲
Functions
Up/volume up(during playback)
Down/volume down(during playback)
System Setting
EXIT
PLAY
STOP
ESC
Left/fast backward(during playback)
▲
MENU
▲
▲
Right/fast forward(during playback)
OK
Set/record(during playback)
MENU
Menu
Play/pause/delete files
DEL.
P/P
STOP
Stop
ESC
Return to last menu/playback
A. press “MENU” key to enter into
REC. Mode
system SET-UP.
Playback
Image Setting
Quality
B. press “OK” to set
Frame Rate
Resolution
Main operations:
Enter into system menu: press “MENU” on remote
Image Setting
Choose items to set up: press direction keys
Confirm your choice: press “OK”
Return to last menu: press “ESC”
H: best image quality
Quality
Frame Rate
H
Resolution
M
M: normal image quality
L: low image quality
L
* the lower the image quality, the longer
the recording time
6
7
Manual
使用说明书
Manual
6.3 Recording setting
6.2.2 Video frame rate
6.3.1 Scheduled time
SET UP
Image Setting
Quality
30fps: smooth image
Frame Rate
30fps
Resolution
15fps
A. press “MENU” key to enter into
system SET-UP.
Image Setting
REC. Setting
15fps: not so smooth image
5fps
5fps: jerky image
REC. Mode
Playback
System Setting
*the lower the frame rate, the longer
the recording time
EXIT
REC. Setting
Scheduled Time
B. system starts and stops recording
automatically according to the scheduled
time period
Overwrite
6.2.3 Image resolution
Section
Motion Detection
Image Setting
Quality
Frame Rate
Resolution
D1: 704X576
D1
VGA: 640X576
VGA
QVGA
Scheduled Time
QVGA: 320X288
*the lower the resolution, the longer
the recording time
C. press “OK” for 4 groups
Group1
press UP/DOWN to choose
Group2
Group3
press “OK” to enter into each group
Group4
8
9
Manual
使用说明书
Manual
*Once(Daily)
*Weekly
移动侦测
A. press LEFT/RIGHT to choose modes:
Weekly
Start Time
End Time
Once
Weekly
Off
Once
A. choose “Once”, press UP/DOWN, “Once”
mode is confirmed when it’s in blue
Off
Weekly: auto record weekly
Once: auto record once
Off: switch off this group
: 07 : 00
: 13 : 00
SUN MON TUE WED THU FRI SAT
B. e.g. to choose “Weekly” mode, press
UP/DOWN, “Weekly” mode is confirmed
when it’s in blue;
press “OK” to the next step, select Start
Time & End Time
Start Time
: 2011/01/01 07 : 00
End Time
: 2011/01/01 13 : 00
B. press “OK ” to move on, please refer to
“Weekly” set-up
*Off
Weekly
Once
Start Time
: 07 : 00
End Time
: 13 : 00
Weekly
Off
Once
Off
A. choose “off”, press UP/DOWN, the group
is switched off when it’s in blue
C. press UP/DOWN to change time; and
RIGHT to move on and select days that
is needed
B. press “ESC” to switch off this group
SUN MON TUE WED THU FRI SAT
Note:
Weekly
Once
Start Time
: 07 : 00
End Time
: 13 : 00
D. e.g. to choose MON, press UP/DOWN
to select/dis-select it;
Off
refer to the picture on the left, MON-FRI
are all selected
Note: purple font means selected, black
font means dis-selected
SUN MON TUE WED THU FRI SAT
E. press “OK” to finish weekly set-up, the
2 yellow triangle will go back onto
“Weekly”(in blue)
F. press “ESC” to save and return to group
list for other groups set-up
10
A. in each group, only one mode can be selected among “Weekly”, “Once” and
“Off”;
B. if scheduled period in “Weekly” overlaps with those in “Once”, system will auto
choose to record under the longer period; the same method applies to overlaps
in between different groups;
C. press UP/DOWN to select each mode in a group, blue font means mode selected;
11
Manual
使用说明书
Manual
6.3.4.1 Mask Area
6.3.2 Overwrite
Motion Detection
REC. Setting
Scheduled Time
Mask Area
Overwrite
Yes
Section
No
A. enter into “Mask Area”, the screen will be
shown in grids as below:
Sensitivity
A. system will delete the first 300MB
files once the SD card is full to
save new files
Motion Detection
Speed
Noise Margin
6.3.3 Section recording time set up
REC. Setting
B. press direction keys to move the cursor to
choose the area needn’t be detected
Scheduled Time
1min
Overwrite
15分钟
5min
Section
15min
Motion Detection
30min
1hr
B. set up section recording time
C. press “OK” to confirm
blue grids area won’t be motion-detected
* only available under “Manual”,
“Scheduled” and “Power Up Rec.”
modes
D. all grids area that the camera covers are
recorded in image
*2.5 min section recording time is
fixed under “Motion Detection” mode
6.3.4 Motion detection
6.3.4.2 Sensitivity
REC. Setting
Motion Detection
H: high level
M: middle level
L : low level
Mask Area
Scheduled Time
C. set motion detection details
Overwrite
Section
Motion Detection
12
Sensitivity
H
Speed
M
Noise Margin
L
* system will be triggered very easily if
sensitivity is set under high level.
13
Manual
使用说明书
Manual
6.4 Recording mode set up
6.3.4.3 Speed
SET UP
Motion Detection
Mask Area
A. different speed levels to trigger system
Sensitivity
H
Speed
M
Noise Margin
L
Image Setting
REC. Setting
*system will be triggered very easily
if speed is set in low level.
set the recording mode for system
REC. Mode
Playback
System Setting
EXIT
6.4.1 Recording modes
6.3.4.4 Noise Margin
choose a mode first:
Manual:
under this mode, press “OK ” to start recording,
and “STOP” to stop recording
SET UP
Motion Detection
Image Setting
Mask Area
Sensitivity
H
Speed
M
Noise Margin
L
B. different noise levels to trigger system
*system will be triggered very easily
if noise is set in low level
Scheduled:
system starts and stops recording according
to the scheduled period preset
REC. Setting
REC. Mode
Manual
Playback
Scheduled
System Setting
Motion Detection
EXIT
Motion Detection:
system starts recording automatically by
detecting motions in the area preset;
*2.5min section recording time is fixed
Power Up Rec.
Power Up Rec.:
system starts to record as soon as the power
is on
14
15
Download DVR Manual
DVR Manual.pdf (PDF, 847.58 KB)
Download PDF
Share this file on social networks
Link to this page
Permanent link
Use the permanent link to the download page to share your document on Facebook, Twitter, LinkedIn, or directly with a contact by e-Mail, Messenger, Whatsapp, Line..
Short link
Use the short link to share your document on Twitter or by text message (SMS)
HTML Code
Copy the following HTML code to share your document on a Website or Blog
QR Code to this page

This file has been shared publicly by a user of PDF Archive.
Document ID: 0000418853.