DU Mesh Replacement guide (PDF)
File information
This PDF 1.4 document has been generated by Writer / LibreOffice 5.1, and has been sent on pdf-archive.com on 18/11/2016 at 22:48, from IP address 87.13.x.x.
The current document download page has been viewed 706 times.
File size: 1.76 MB (6 pages).
Privacy: public file


File preview
Mesh Replacement Script
This guide has the purpose of explaining how to setup a build of Daggerfall Unity
capable of replacing vanilla Daggerfall models with new meshes imported using
a script written by Uncanny_Valley.
A preprequisite of this guide is a working installation on the Unity editor and a
clone of DU source code. Here you can found a tutorial on how to do that.
Part 1: exporting the mesh
When exporting your model from a modelling software you need to take a few
things in consideration:
•
Models exported from Daggerfall Modelling are forty times bigger than
they need to be in order to be used in Unity, so you need to scale them
down by 0.025.
•
Unity engine reads models as Y-up not Z-up. You can use this plugin for
blender to address this. Of course, remember to check also the origin of
models.
•
This script allows a 1:1 replacement of a mesh only. Your model can’t be
made by more than one part, nor you can use unity prefabs, it needs to
be a single mesh with less than 65,534 vertices. Unity supports diferent
formats, but exporting to .fbx is suggested.
Part 2: setting up the code
Once you have your copy of the source code, you simply need to download
Uncanny_Valley script (Here you can fnd an updated version), estract the .7z
package and overwrite the fles inside daggerfall-unity-master.
Part 3: importing your model
1. Go to daggerfall-unity-master\Assets\Resources\Models and create a
subfolder. Rename it with the ID of the model and place the .xfb fle
inside. Your model also need to be named after the ID.
2. Place the relative textures inside
daggerfall-unity-master\Assets\Resources\Textures. You need to do so
even if you’re using vanilla textures.
3. Now open Unity and let it import all the new fles. When it’s done,
navigate to the model subfolder in the project window and create new
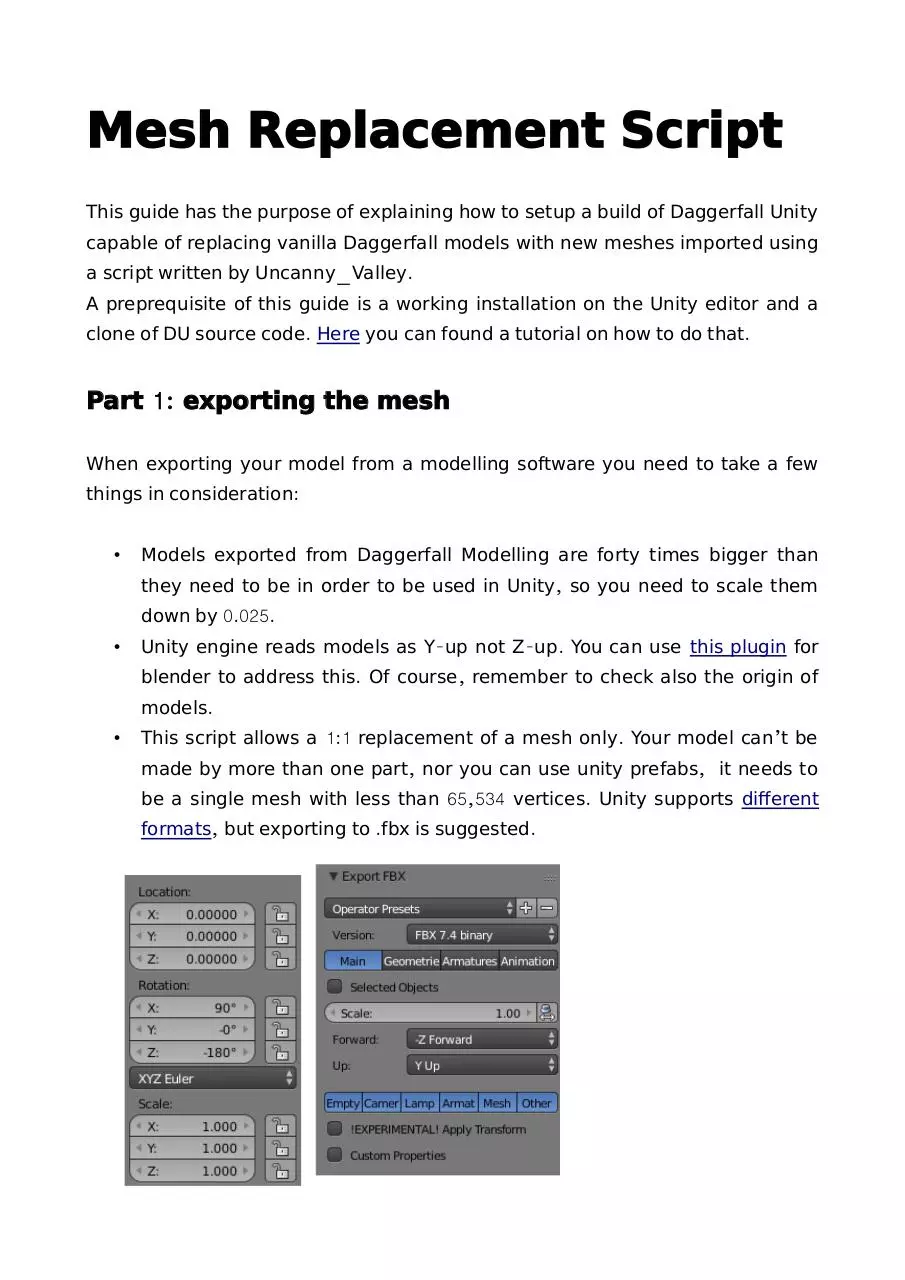
materials, one for each texture you need to use. Materials need to be
called ‘Material_x’, where x is a number starting from 0. For example, if
you have two textures you will create Material_0 and Material_1.
4. Link these new materials to the corrispective textures. You may need to
make a few tries to get the correct order. As an alternative, you can drag
your model in the scene view and assign to it the new materials. Doing so,
you will be able to check you assigned the right textures.
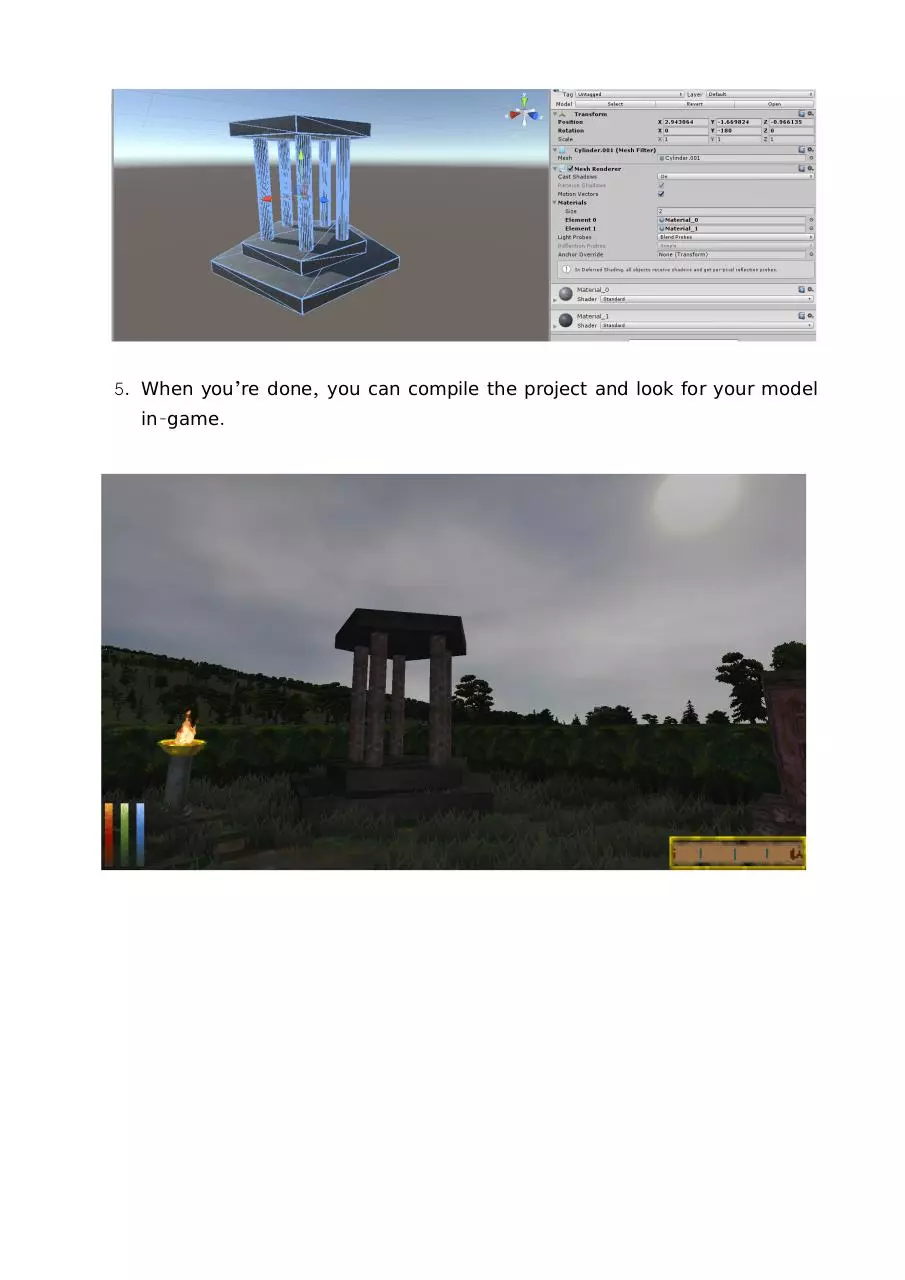
5. When you’re done, you can compile the project and look for your model
in-game.
F. A. Q.
Why the diference in scale?
Quoting MeshReader.cs:
// Using 1/40 scale (or * 0.025).
// True world scale is 1/39.37007874015748 (or * 0.0254). Basically conversion is inches (Daggerfall) to metres (Unity).
// 1/40 scale has been carefully chosen as it is close to true scale but requires less floating-point precision
// for tiling assets. It also produces numbers easier to remember for editor layouts and is easier to
// calculate manually (i.e. just divide by 40 to convert native units to Unity units).
// For example, an RMB block dimension is 4096 native units.
// 4096 / 40 = 102.4 (easy to remember for manual editor layouts, less precision required).
// 4096 * 0.0254 = 104.0384 (harder to remember for manual editor layouts, more precision required).
// This means world is slightly smaller over large distances (13107.2m error across entire map width).
I can see only terrain without any building in- game.
Please check your model has less than 65,534 vertices and it’s made of only one
part.
Import textures in Blender
This part of the guide is for people who are new to Blender, or modelling in
general, and would like to start experimenting with the meshes of Daggerfall.
When you import the model from Daggerfall Modelling, you can see a grey mesh
without any textures. To import them you frst need to fnd the .png fles inside
the folder created by DM.
Inside Blender, I suggest you to switch to Cycles render (in the top tab), then
go to materials tab (in the right). You can see there are already some materials
there, but they arent' of any use.
Delete them and create new materials, one for
each texture. Now click at the right of color and
select image, it will let yo browse in your pc and
open the .png texture fles.
Uv maps are imported with the model so you only need to select the correct
faces in edit mode and click assign.
When you switch to texture you can see the model as in Daggerfall Modelling.
Download DU Mesh Replacement guide
DU_Mesh_Replacement_guide.pdf (PDF, 1.76 MB)
Download PDF
Share this file on social networks
Link to this page
Permanent link
Use the permanent link to the download page to share your document on Facebook, Twitter, LinkedIn, or directly with a contact by e-Mail, Messenger, Whatsapp, Line..
Short link
Use the short link to share your document on Twitter or by text message (SMS)
HTML Code
Copy the following HTML code to share your document on a Website or Blog
QR Code to this page

This file has been shared publicly by a user of PDF Archive.
Document ID: 0000509616.