Instructions to put together the four poster bed (PDF)
File information
Author: Scott Burman
This PDF 1.5 document has been generated by Microsoft® Word 2013, and has been sent on pdf-archive.com on 09/12/2016 at 19:18, from IP address 82.28.x.x.
The current document download page has been viewed 689 times.
File size: 1.54 MB (7 pages).
Privacy: public file


File preview
Instructions to put together the four poster bed
Completed bed.
This is the internal structure of the bed.
The first thing to do is to attach the four sides of the
bed.
Each side is attached via a metal bracket and four
screws.
Initially attach the three sides of the bed where the
metal bracket is attached to one of those sides.
Next attach one of the corner posts of the bed,
namely the one with the metal brackets attached.
The reason for this is that these Allen screws that
attach the metal bracket to the corner post are a little
worn and therefore it is best to keep it attached
permanently.
Attach the metal corner bracket to the side of the bed
then tighten up the Allen screws with an Allen key.
Next attach the remaining posts to the corners of the
bed using the Allen key.
This shows how the corner posts should be attached.
Next attach the top part of the bed that go around all
four sides.
Turn the screw head so the arrow is pointing at the
screw that is about to be inserted into the hole.
Then turn the screw so that the arrow faces away.
Repeat for all of the sides of the bed at the top.
This shows what the top of each corner should look
like.
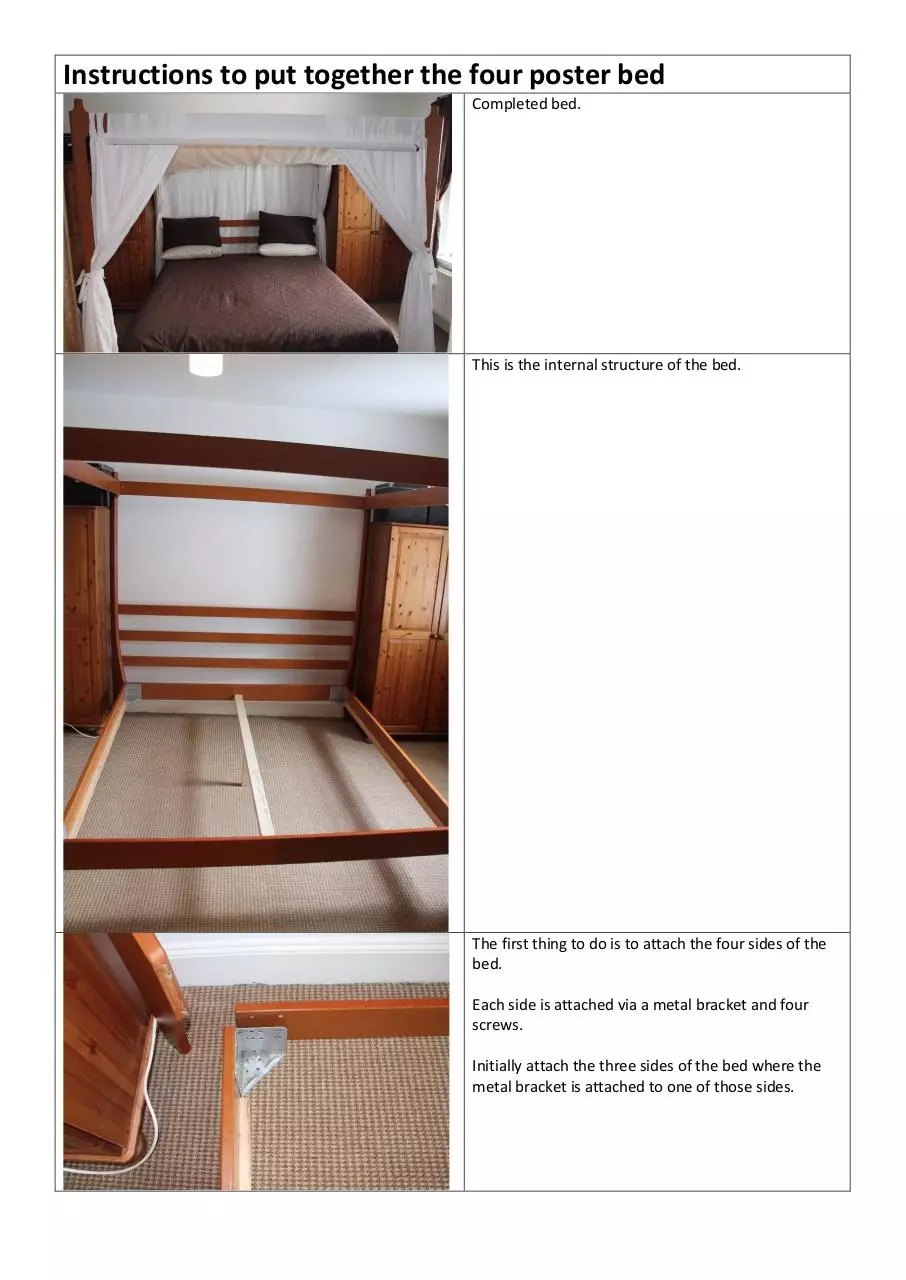
Next insert the three slats that go behind the head
end of the bed.
Please note that they are all slightly different lengths
and you need to ensure you have the right one in the
right slot.
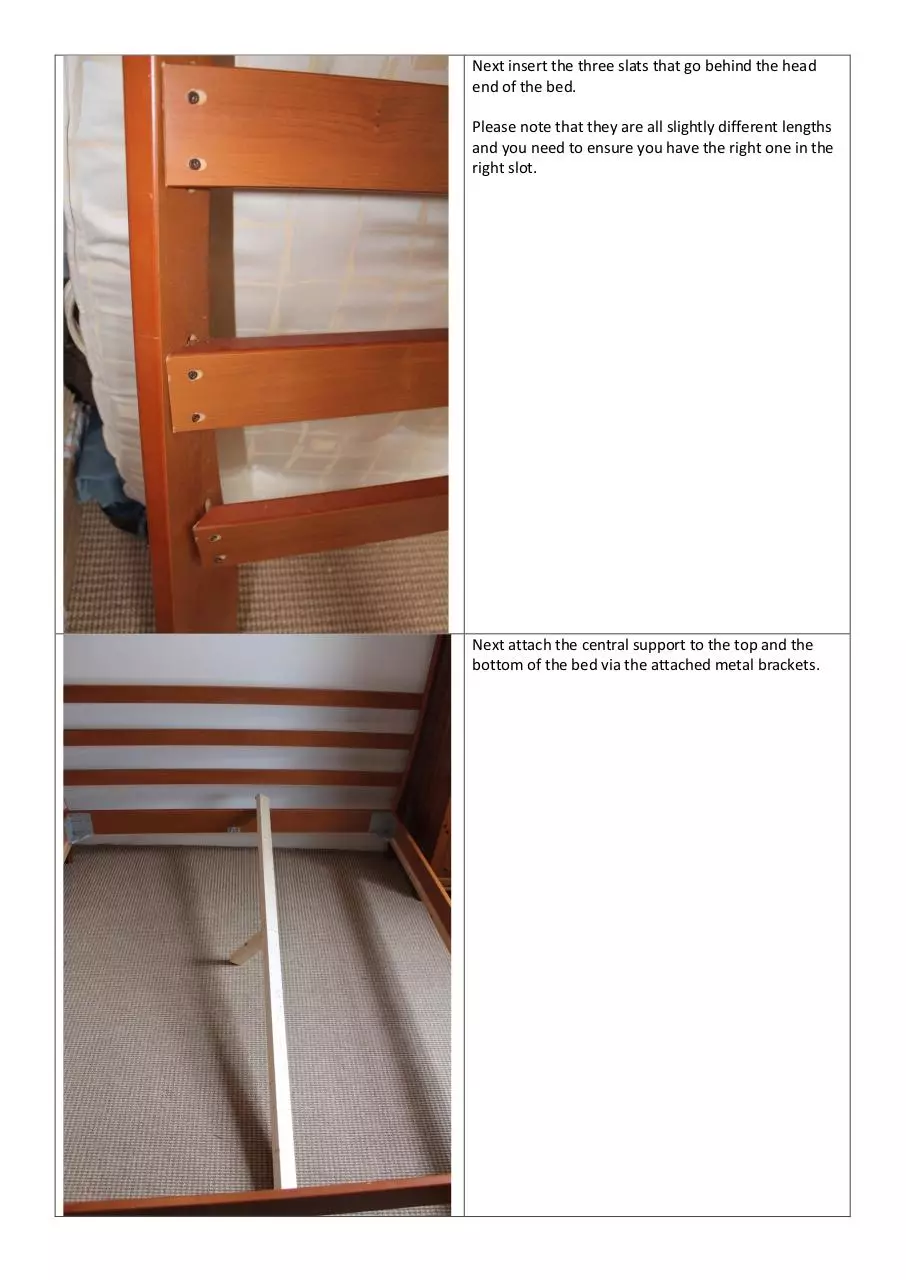
Next attach the central support to the top and the
bottom of the bed via the attached metal brackets.
Next attach all of the wooden slats to each side of the
bottom of the bed so one end is screwed into the
edge and one into the central support.
The slats are brand new and therefore you may need
an electric screwdriver to drill in the screws.
I have purchased twice as many slats as is required so
please ensure either they are close together or
perhaps you may wish to cut some off if in excess.
This is what the bed should look like when completed.
Please ensure you have tightened the screws and
bolts.
To hang the curtains to each corner of the bed you
need to again turn the arrowed screw head towards
the piece of wood it is attached to, separate both
pieces of wood, put the curtains on and re-attach
remembering to turn the screw back head the other
way.
Three of the top sides of the bed should have two
curtains to the left and right. There are none behind
the head of the bed.
To drape the fabric over the top of the bed you need
to insert the supplied pieces of wood into both ends
of the fabric as shown.
As stated, one end is torn and has never been
repaired as it makes it easier to insert the piece of
wood. This end hangs over the back of the bed and is
never seen. The other end hangs over the foot of the
bed.
This is what the draped fabric should look like over
the head end of the bed.
This is what the draped fabric looks like over the foot
end of the bed.
Download Instructions to put together the four poster bed
Instructions to put together the four poster bed.pdf (PDF, 1.54 MB)
Download PDF
Share this file on social networks
Link to this page
Permanent link
Use the permanent link to the download page to share your document on Facebook, Twitter, LinkedIn, or directly with a contact by e-Mail, Messenger, Whatsapp, Line..
Short link
Use the short link to share your document on Twitter or by text message (SMS)
HTML Code
Copy the following HTML code to share your document on a Website or Blog
QR Code to this page

This file has been shared publicly by a user of PDF Archive.
Document ID: 0000520394.