R3 Instructions (PDF)
File information
Author: Ben
This PDF 1.5 document has been generated by Microsoft® Word 2016, and has been sent on pdf-archive.com on 13/04/2017 at 02:44, from IP address 110.140.x.x.
The current document download page has been viewed 533 times.
File size: 749.77 KB (4 pages).
Privacy: public file


File preview
Renken Yamaha R3 Fender Eliminator Installation Instructions
Parts Included:
Renken Yamaha R3 Fender Eliminator
2 x indicator spacers
Velcro cable tie
4 x bolts and lock nuts
2 x washers
2 x Licence plate light spacers
Tools Required:
8mm wrench
10mm wrench
4mm Allen key
Philips head screw driver
Tool kit under R3 passenger seat cowl
Expected Installation Time: 5-15 minutes
1. Remove OEM Fender
a) Remove passenger seat (key hole on left side of body)
b) Remove seat trim (two screws with Allen key heads)
c) Remove front seat (two 8mm bolts)
d)Remove plastic tray (two pop rivets)
d) Disconnect indicator terminals (4 bullet connectors under clear plastic insulator) and licence plate light
e) Remove OEM fender (four 10mm nuts) and set aside nuts for use later
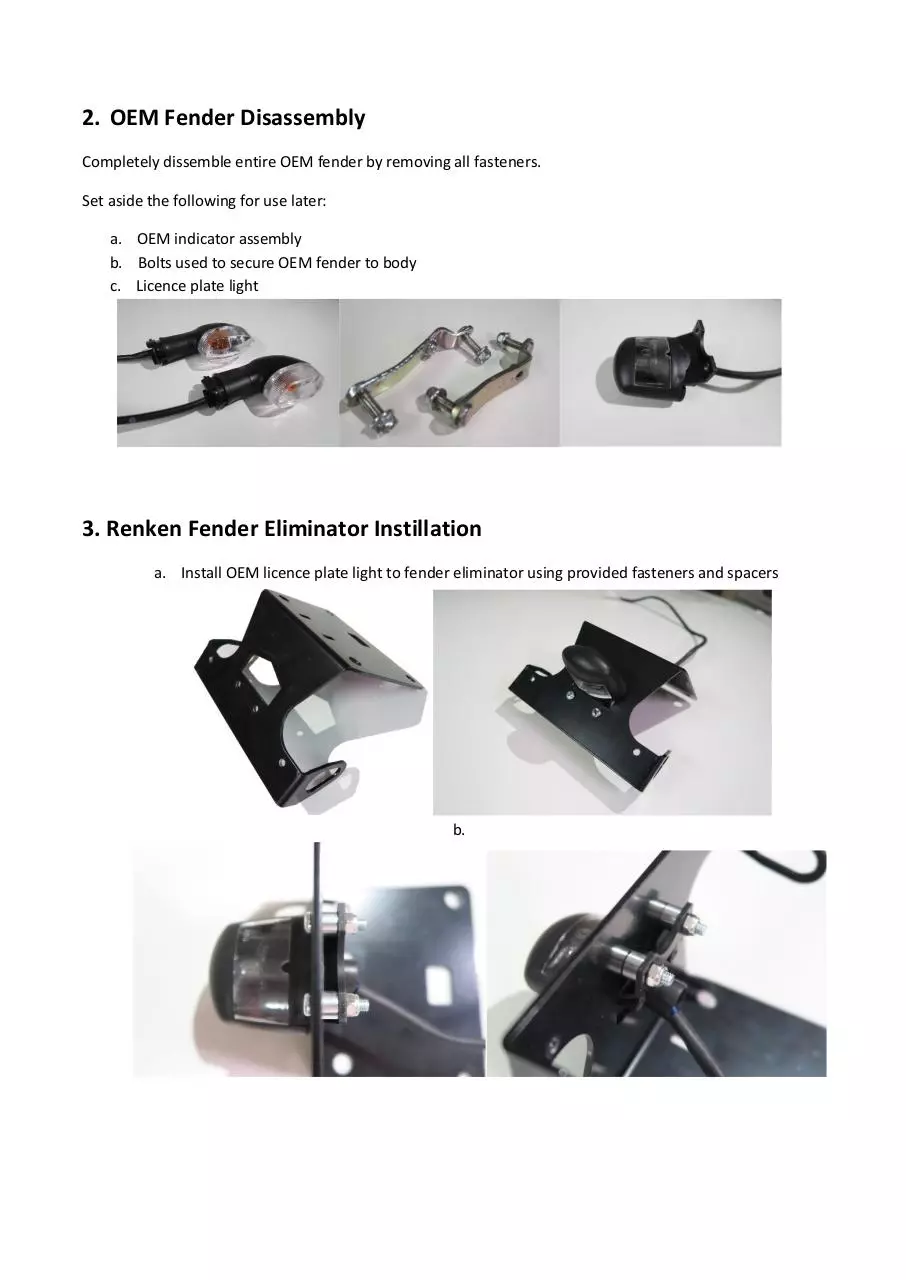
2. OEM Fender Disassembly
Completely dissemble entire OEM fender by removing all fasteners.
Set aside the following for use later:
a. OEM indicator assembly
b. Bolts used to secure OEM fender to body
c. Licence plate light
3. Renken Fender Eliminator Instillation
a. Install OEM licence plate light to fender eliminator using provided fasteners and spacers
b.
c. Fit indicator spacers to OEM indicators
d. Install OEM indicators with spacers to fender eliminator (if having difficulty apply a small amount of oil)
- Green and Black connectors go on right side
- Brown and Black connectors go on left side
e.
f.
g.
h.
i.
j.
Attach licence plate to fender eliminator
Bolt fender eliminator to bike using bolts saved from step 2.b (reverse of step 1.f)
Feed indicator and licence plate cables into bike and secure with provided cable tie
Re-connect indicators and licence plate light cables (reverse of step 1.e)
Reinstall front seat, seat trim, plastic tray and rear seat (reverse of steps 1.d,c,b)
INSTILATION COMPLETE!
Terms & Conditions:
Renken R3 fender eliminator has been designed for the use of modifications, Renken is not responsible to misuse of products, or verification of
the transport regulatory authority. Installation should only be performed by experienced motorcycle mechanics. If you do not possess the
tools or experience to complete the instillation, contact a qualified mechanic. Failure to properly install this part could result in damage of
property, injury or death. Renken is not responsible for damages incurred from improper use or instillation.
Download R3 Instructions
R3 Instructions.pdf (PDF, 749.77 KB)
Download PDF
Share this file on social networks
Link to this page
Permanent link
Use the permanent link to the download page to share your document on Facebook, Twitter, LinkedIn, or directly with a contact by e-Mail, Messenger, Whatsapp, Line..
Short link
Use the short link to share your document on Twitter or by text message (SMS)
HTML Code
Copy the following HTML code to share your document on a Website or Blog
QR Code to this page

This file has been shared publicly by a user of PDF Archive.
Document ID: 0000581853.