Colourful Plaguebearers (PDF)
File information
This PDF 1.4 document has been generated by Google / , and has been sent on pdf-archive.com on 06/06/2017 at 16:21, from IP address 37.228.x.x.
The current document download page has been viewed 694 times.
File size: 3.89 MB (11 pages).
Privacy: public file
File preview
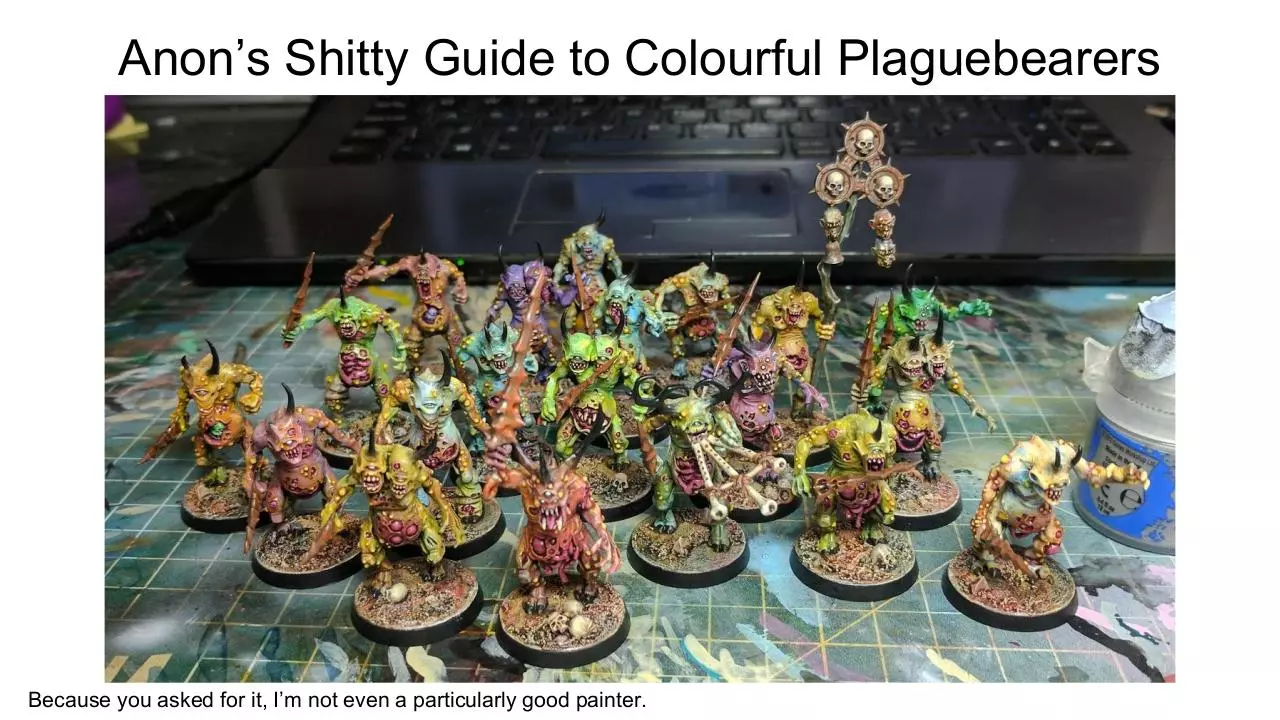
Anon’s Shitty Guide to Colourful Plaguebearers
Because you asked for it, I’m not even a particularly good painter.
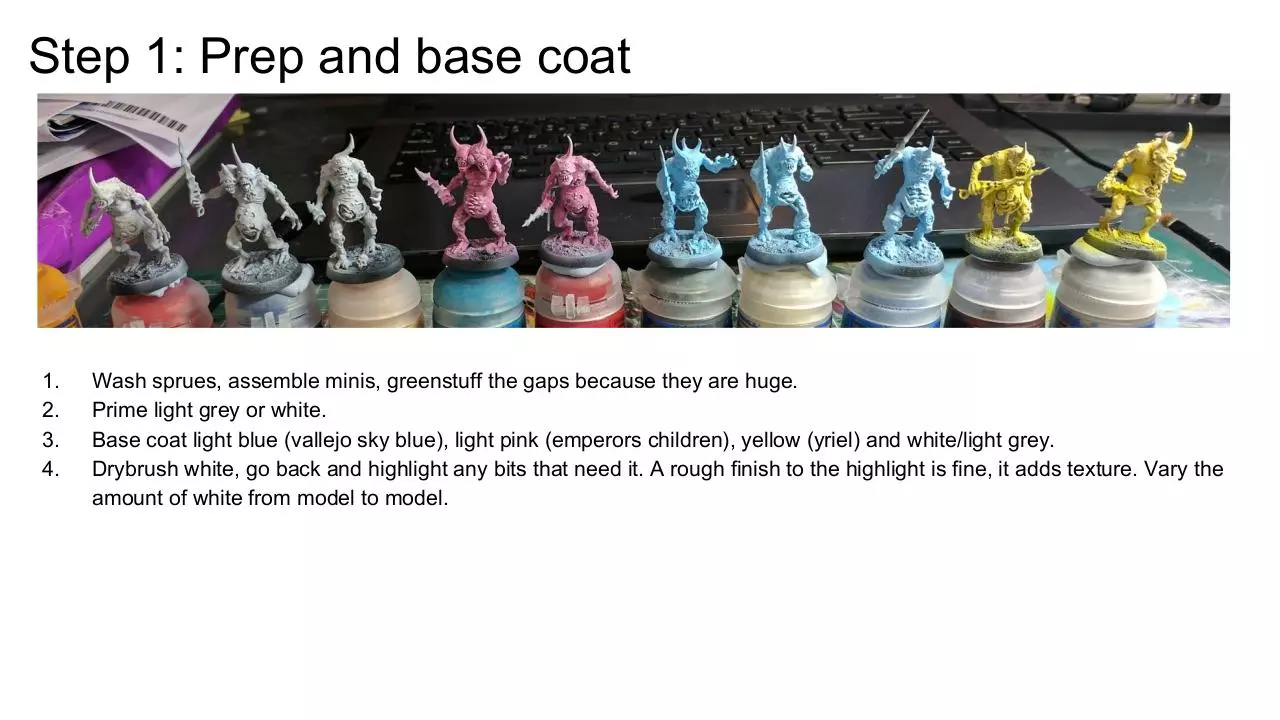
Step 1: Prep and base coat
1.
2.
3.
4.
Wash sprues, assemble minis, greenstuff the gaps because they are huge.
Prime light grey or white.
Base coat light blue (vallejo sky blue), light pink (emperors children), yellow (yriel) and white/light grey.
Drybrush white, go back and highlight any bits that need it. A rough finish to the highlight is fine, it adds texture. Vary the
amount of white from model to model.
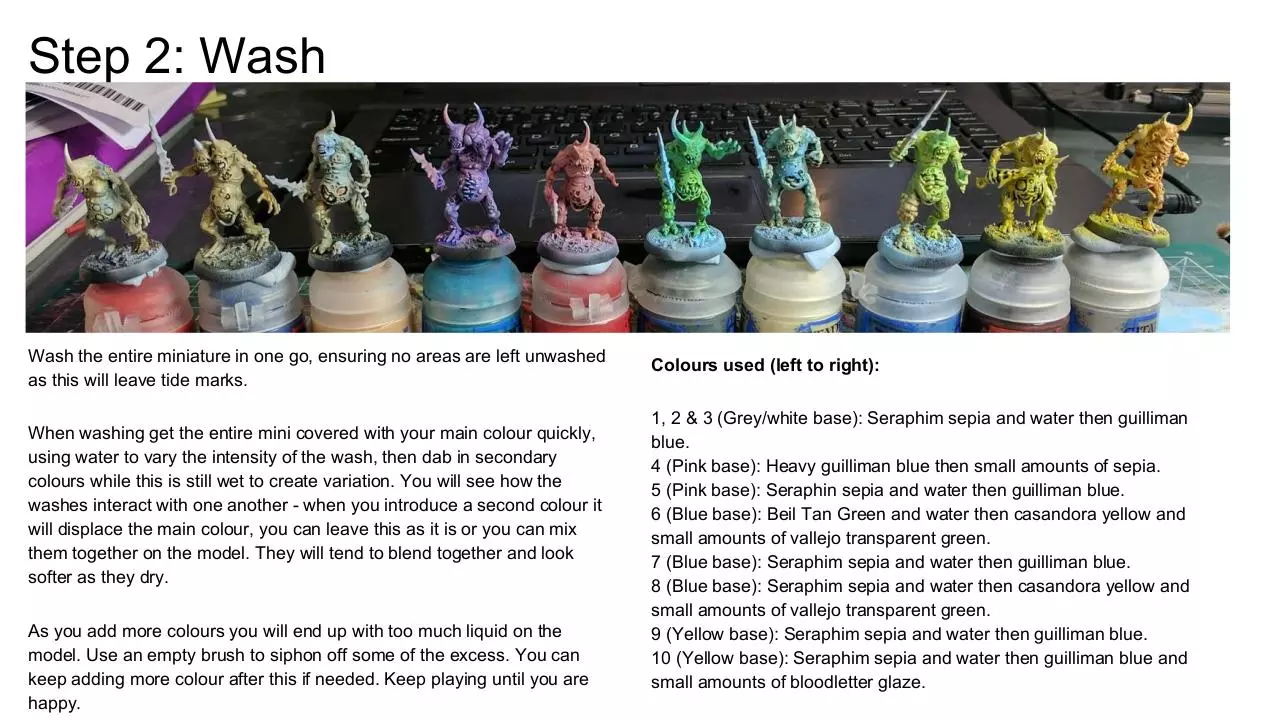
Step 2: Wash
Wash the entire miniature in one go, ensuring no areas are left unwashed
as this will leave tide marks.
When washing get the entire mini covered with your main colour quickly,
using water to vary the intensity of the wash, then dab in secondary
colours while this is still wet to create variation. You will see how the
washes interact with one another - when you introduce a second colour it
will displace the main colour, you can leave this as it is or you can mix
them together on the model. They will tend to blend together and look
softer as they dry.
As you add more colours you will end up with too much liquid on the
model. Use an empty brush to siphon off some of the excess. You can
keep adding more colour after this if needed. Keep playing until you are
happy.
Colours used (left to right):
1, 2 & 3 (Grey/white base): Seraphim sepia and water then guilliman
blue.
4 (Pink base): Heavy guilliman blue then small amounts of sepia.
5 (Pink base): Seraphin sepia and water then guilliman blue.
6 (Blue base): Beil Tan Green and water then casandora yellow and
small amounts of vallejo transparent green.
7 (Blue base): Seraphim sepia and water then guilliman blue.
8 (Blue base): Seraphim sepia and water then casandora yellow and
small amounts of vallejo transparent green.
9 (Yellow base): Seraphim sepia and water then guilliman blue.
10 (Yellow base): Seraphim sepia and water then guilliman blue and
small amounts of bloodletter glaze.
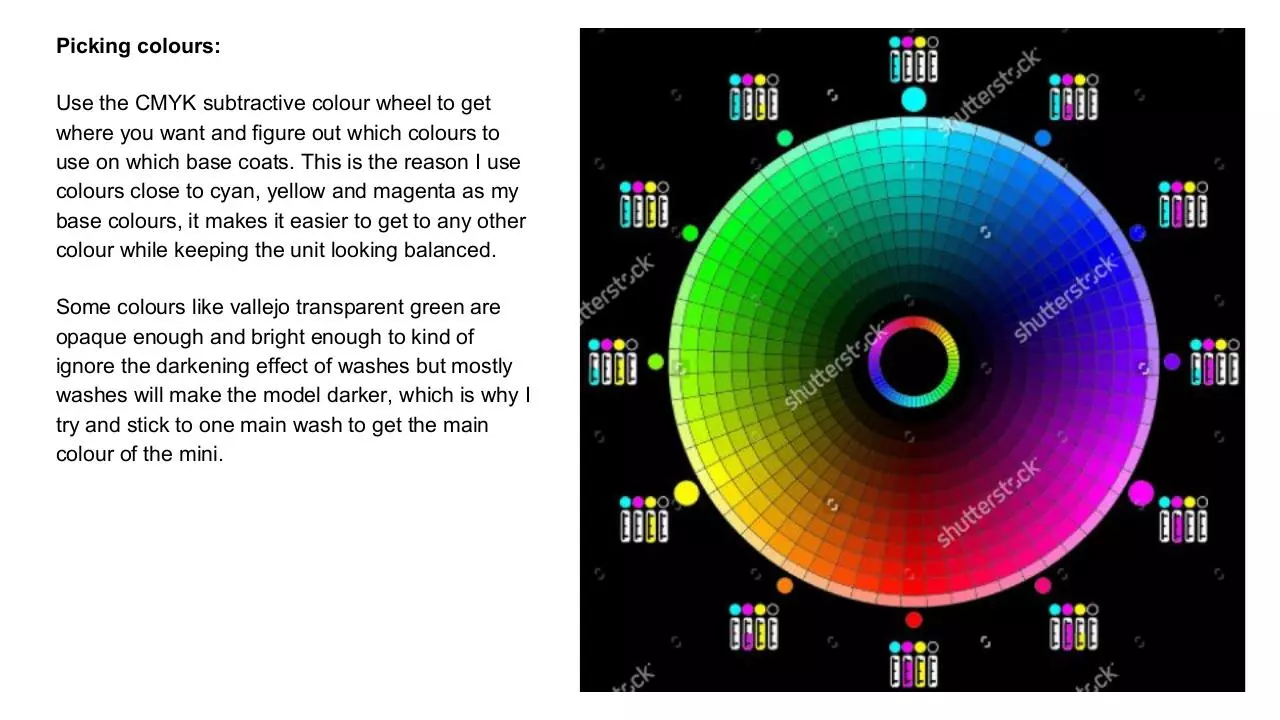
Picking colours:
Use the CMYK subtractive colour wheel to get
where you want and figure out which colours to
use on which base coats. This is the reason I use
colours close to cyan, yellow and magenta as my
base colours, it makes it easier to get to any other
colour while keeping the unit looking balanced.
Some colours like vallejo transparent green are
opaque enough and bright enough to kind of
ignore the darkening effect of washes but mostly
washes will make the model darker, which is why I
try and stick to one main wash to get the main
colour of the mini.
Step 3: Shading
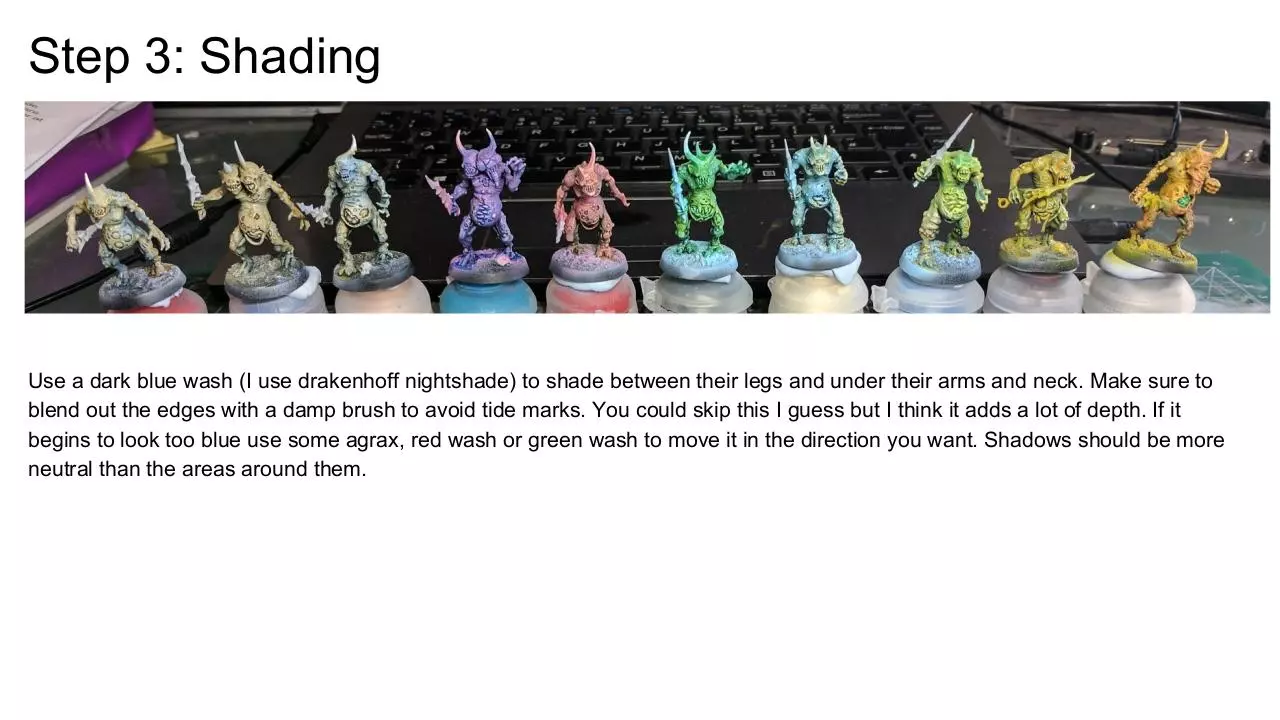
Use a dark blue wash (I use drakenhoff nightshade) to shade between their legs and under their arms and neck. Make sure to
blend out the edges with a damp brush to avoid tide marks. You could skip this I guess but I think it adds a lot of depth. If it
begins to look too blue use some agrax, red wash or green wash to move it in the direction you want. Shadows should be more
neutral than the areas around them.
Step 4: Yellow
Paint casandora yellow around all the areas you want to be discoloured bruised looking, including boils, spines, wounds.
You can either use very thin layers to build up the colour or you can blob it on and use a damp brush to blend it out, either way
try and avoid tide marks. The aim is soft transitions. Its pretty easy with casandora yellow, it is a 10/10 paint.
Step 5: Red n ting
Repeat step 4 but with carroburg crimson. This paint loves to make tide marks so be careful to make sure the edges are
blended out, I prefer multiple very thin layers to glaze it on for this. Vary the amount of layers you do on each guy so that the
colours are more varied. Takes a while but looks good.
Step 6:
Highlight
I hardly do any of this on
plaguebearers and
nurglings, only where it
really needs it, but on more
important stuff like this
herald I’ve done a lot to
define the features of the
model. I like to glaze on
mostly layers of bone to
build a translucent skin-like
texture. I also use red, green
and blue for variation. Give
some thought to where really
needs it, don’t just splodge it
on, it will look shite.
Details:
Pink bits and teeth: Base with screamer pink, highlight with pink horror and emperor’s children. Paint the
teeth with a bone colour, I use pallid witch flesh.
Eyes: Nuln oil then white eyes. The black outline helps the miniature a lot.
Download Colourful Plaguebearers
Colourful Plaguebearers.pdf (PDF, 3.89 MB)
Download PDF
Share this file on social networks
Link to this page
Permanent link
Use the permanent link to the download page to share your document on Facebook, Twitter, LinkedIn, or directly with a contact by e-Mail, Messenger, Whatsapp, Line..
Short link
Use the short link to share your document on Twitter or by text message (SMS)
HTML Code
Copy the following HTML code to share your document on a Website or Blog
QR Code to this page

This file has been shared publicly by a user of PDF Archive.
Document ID: 0000607992.