LDoE Guide for v1.5.11 (PDF)
File information
Author: Caspar van Gerwen
This PDF 1.4 document has been generated by Writer / OpenOffice 4.1.3, and has been sent on pdf-archive.com on 24/09/2017 at 21:05, from IP address 76.72.x.x.
The current document download page has been viewed 566 times.
File size: 89.38 KB (12 pages).
Privacy: public file


File preview
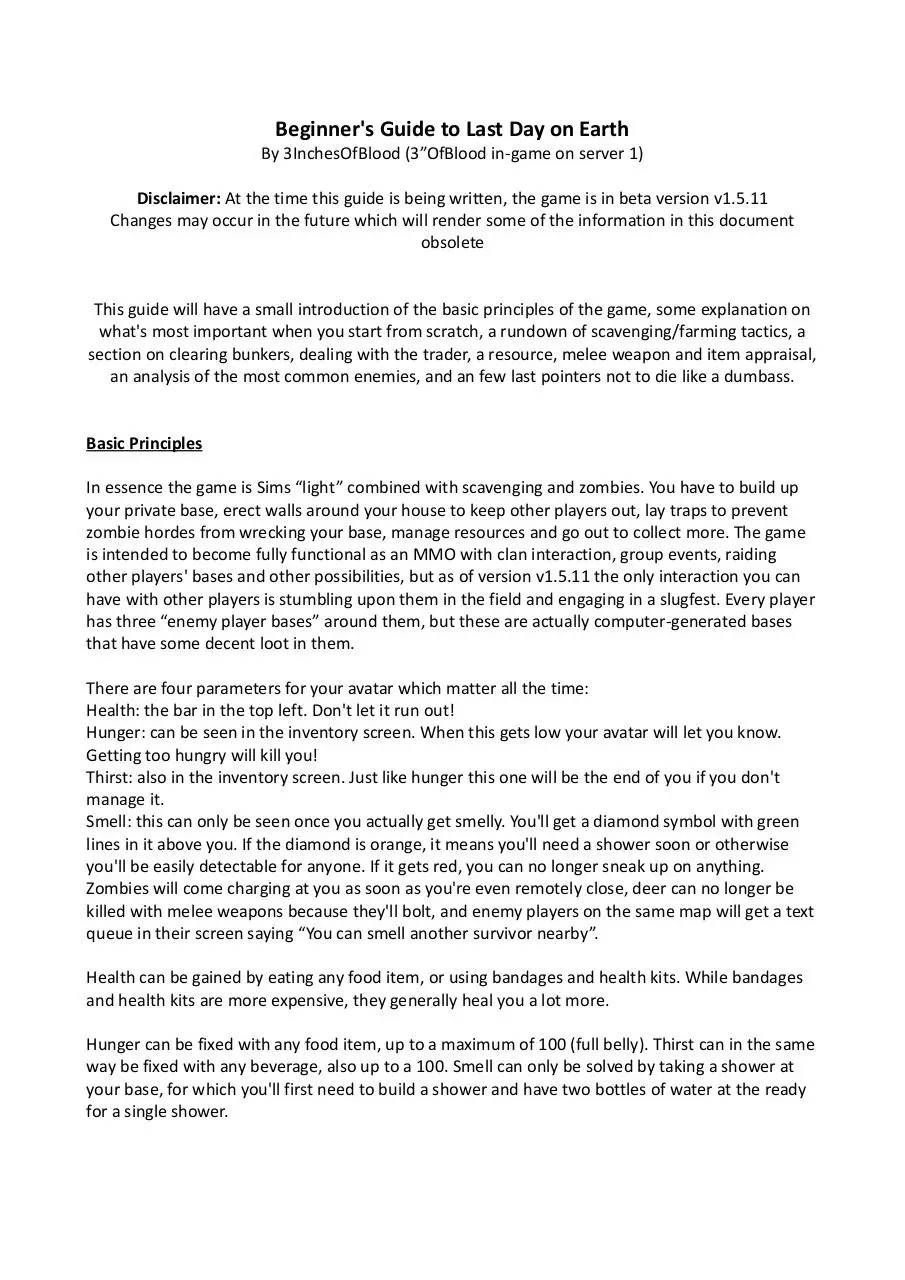
Beginner's Guide to Last Day on Earth
By 3InchesOfBlood (3”OfBlood in-game on server 1)
Disclaimer: At the time this guide is being written, the game is in beta version v1.5.11
Changes may occur in the future which will render some of the information in this document
obsolete
This guide will have a small introduction of the basic principles of the game, some explanation on
what's most important when you start from scratch, a rundown of scavenging/farming tactics, a
section on clearing bunkers, dealing with the trader, a resource, melee weapon and item appraisal,
an analysis of the most common enemies, and an few last pointers not to die like a dumbass.
Basic Principles
In essence the game is Sims “light” combined with scavenging and zombies. You have to build up
your private base, erect walls around your house to keep other players out, lay traps to prevent
zombie hordes from wrecking your base, manage resources and go out to collect more. The game
is intended to become fully functional as an MMO with clan interaction, group events, raiding
other players' bases and other possibilities, but as of version v1.5.11 the only interaction you can
have with other players is stumbling upon them in the field and engaging in a slugfest. Every player
has three “enemy player bases” around them, but these are actually computer-generated bases
that have some decent loot in them.
There are four parameters for your avatar which matter all the time:
Health: the bar in the top left. Don't let it run out!
Hunger: can be seen in the inventory screen. When this gets low your avatar will let you know.
Getting too hungry will kill you!
Thirst: also in the inventory screen. Just like hunger this one will be the end of you if you don't
manage it.
Smell: this can only be seen once you actually get smelly. You'll get a diamond symbol with green
lines in it above you. If the diamond is orange, it means you'll need a shower soon or otherwise
you'll be easily detectable for anyone. If it gets red, you can no longer sneak up on anything.
Zombies will come charging at you as soon as you're even remotely close, deer can no longer be
killed with melee weapons because they'll bolt, and enemy players on the same map will get a text
queue in their screen saying “You can smell another survivor nearby”.
Health can be gained by eating any food item, or using bandages and health kits. While bandages
and health kits are more expensive, they generally heal you a lot more.
Hunger can be fixed with any food item, up to a maximum of 100 (full belly). Thirst can in the same
way be fixed with any beverage, also up to a 100. Smell can only be solved by taking a shower at
your base, for which you'll first need to build a shower and have two bottles of water at the ready
for a single shower.
There are four other icons at the bottom of your portrait in the inventory screen. The left one is
your raw attack power with the equipped weapon, which is the damage you deal minus the armor
of the enemy. So far, only other players with clothes on have armor. The second icon is your armor
rating. The third is your running speed, which will improve with better footwear. This can be very
helpful when trying to escape from a rough area. The fourth is your attack speed. The higher the
value, the faster you'll swing.
When you are in your inventory, you have eight slots to put items in (your “pockets” in the upper
left). Once you equip a backpack, you'll have eight more (lower left). One slot of either of these can
hold up to one weapon, one piece of furniture, one specialized item (like a fuel tank or a truck
wheel) or 20 units of a resource or small item.
You can equip one weapon or tool at the ready, and one weapon or health item(s) in your second
slot (the one with the pocket symbol in your inventory screen). You can wear one full set of
clothing.
Clothes, tools and weapons deteriorate with use or by taking damage. Always be aware of how
damaged they are when scavenging!
When travelling the world map (by going off the green edges of the area you're in), you will find
certain locations you can go to: forests, quarries, other players' bases, watchtowers, bunkers and
special event locations. Right now only the forests, quarries, bunkers and special event locations
are accessible. Locations for farming resources are colored green, yellow or red, depending on
difficulty levels, green being the easiest and red the hardest. Special event locations include: plane
crashes, supply drops, humanitarian aid boxes, “the dealer” and chopper events. The bunkers are
still under development, so far only bunkers Alfa [sic], Bravo and possibly Charlie (with verhicles)
are available.
Every x amount of hours a zombie horde will come rampaging through your base. Don't panic! So
far they only tear down walls and traps, which is inconvenient but not game-ending. Just make
sure you're either not at your base or have closed out the app when the horde rolls in, or your
avatar might just get whacked. It is also entirely possible that the horde simply misses your house
(zombies are really stupid). If you have lvl. 2 (plank) or lvl. 3 (stone) walls, the horde doesn't even
seem to be able to damage them, so once you have those you're in the clear.
Everytime you attack, pick stuff up of the ground, cut down a tree or mine for stone and ore, you
get experience. When you level up, your health goes back to 100 and you get two extra blueprint
points which you can spend to unlock new things to build.
Obviously, the game has pay-to-win mechanics. You might get frustrated because you're out of
travelling energy, or you just can't get past the 2nd basement level of Bunker Alfa [sic]. When you
feel the urge to chuck money at it, remember: the game is in beta development. The chance that
they'll change everything around a month from now and make you regret spending money in the
first place is pretty big. I'm playing because I want to be a high level and have a well-developed
base when and if the game gets completed. But just in case they eventually scrap it, I'll be happy
not to have paid $100 for weapon packs and energy just to clear bunkers they haven't even
finished mapping out and programming yet.
Starting From Scratch
When you start a new game, you'll find yourself nearly naked next to a truck. Not the most ideal
scenario in a zombie apocalypse. So how do we get ourselves back on track?
First things first: check what you have on your person, in the truck and in your immediate area (in
that order). Equip any weapons and clothing, and put any food items in your second weapon/item
slot (the “pocket” slot in the inventory screen). Now go scout the entire area you are in, not
entering the green zones (this will get you to the world map, for which you are not yet ready). Use
the minimap in the top-right corner to see when you get in range of an enemy. Once you do, stop
and go into crouch mode (bottom-right corner button). Approach the enemy from the back or
sides, so it won't see you. This way, the first attack you get in, will do 3x damage, making the fight
easier and making your weapons last longer. If you take significant damage, use the food item you
put in your second weapon/item slot (the button on the upper-right of the attack button) to heal
back up to a safe range (don't need to go all the way to 100 immediately, resources are still scarce).
Keep going until you clear the field, then loot the corpses. After that, press the button in the
bottom-left corner to engage auto-mode. In auto-mode, your avatar will keep collecting stuff off
the ground as long as you have open inventory slots. It will automatically engage any enemies in
the way, which is why it is smarter to clear the field first, so you can make use of the sneak 3x
damage advantage. Auto-mode will also chop down trees and mine stone and ore if you have the
right tools in your inventory (no need to equip a pickaxe or hatchet in your weapon slot for that).
Therefore, once you're done with the stuff on the ground, go to the construction menu (button
with a wrench on it) and select and build a hatchet and/or pickaxe, depending on if there's both
rocks and trees in your area. Auto-mode it again to get the fastest resource collection possible. If at
any time you run out of inventory space, you can drop stuff off at the truck, which gives you eight
additional storage slots.
Now that you've cleaned out your base area, it is time to evaluate which things to build first and
why.
1. 2x2 floor. Why? Small boxes, that's why. With the sheer amount of items this game offers,
the eight slots in your inventory and the eight in your truck will not tie you over. Since this
2x2 floor will likely expand into the storage building, I personally prefer to build it in a
corner not close to the truck either south or west, because then you'll only need to build
two sides of traps to keep your walls safe (as far as I can tell, zombie hordes always come
from the northeast).
2. Small boxes. They require minimal resources and give you a lot more storage space. They
need floors to be built upon.
3. Backpack. Scavenging for resources is pretty pointless if you can barely carry anything
home.
4. Rain catcher. This one is super important. You can refill empty water bottles at this, and
they refill pretty quickly. Since filled water bottles are necessary both not to die of thirst
and to shower, you'll want to refill all your empty bottles asap.
5. Shower. Once you stink like the back end of an ox, no deer or zombie will have any trouble
noticing you from a mile away. As sneaking is your best chance to clear an area effectively,
you'll want to avoid being smelly.
6. Garden bed. You can plant carrot seeds here (which you'll sometimes collect when picking
up plant fiber) which will give you carrots in return. An excess of food is always important,
especially since it'll be your best early-to-mid-game healing option as well.
7. Camp stove. Cooking either raw meat or carrots will give you a better version that'll heal
you more and make you more full. The cost of pine logs as fuel is worth it when it comes to
being able to effectively heal in the field. Once you have meat dryers to make beef jerky I'd
advise you to do that instead of making steaks, as it will cost less pine logs that way. You
can also create charcoal by burning pine logs with pine logs, giving you a resource that
makes smelting metals much more effective.
8. Woodworking bench. Turns pine logs into planks. You're going to need a LOT of planks for
construction and some of the better weapons, so you'll need two of these babies running
around the clock once you've got your base set up.
9. Small chest. Those boxes are great and all, but eight slots is still a little weak to justify
occupying an entire floor square. With this upgrade you get twelve slots per floor square,
way better deal.
10. Tanning rack. All those pelts you collect can be turned into leather, which is crucial for
advanced armor and some weapons.
11. Smelter. Oh lord, if there is one thing I hate about this game is the excruciatingly slow pace
at which you'll produce iron bars. Get that stuff going as soon as you can. This thing can
convert both metal scrap and iron ore, so you'll be able to keep the fire going if you farm
and scavenge intelligently.
12. Stonecutter's bench. As you're improving your building(s), you'll find that you will need a
bucketload of stone bricks. Better start that this soon, so you won't be waiting for days
once you actually want those nice stone floors and walls.
13. CB Radio. Whether you're looting corpses, opening chests and bags in the field, or going to
supply drops or plane crashes, you'll end up with a lot of random stuff at your base. With
the CB radio you can call in “the dealer,” who will be willing to exchange any random
number of some item of yours for most likely a more useful item for you. This is
unfortunately bugged at the moment for iOS, where the CB radio will only give you access
codes to bunker Alfa [sic].
By the time you've executed all of the list above, you'll most likely have a decently functioning base
running and are ready to mold it into a strong fortress.
Pro tips:
– As the game does not yet allow players to attack other players, you don't actually *need*
walls. It's not something to get all worked up about if you haven't gotten it all figured out
by the time the first horde rolls in. The zombies don't steal your stuff or destroy your
appliances anyway.
– I hate running back and forth around my base to sort everything and keep my farms,
stoves, smelters etc. going. I've put the farms and next to the truck, so I can keep the carrot
seeds and in the trunk and quickly switch my production around. All the appliances needed
to convert resources are huddled together in a separate building with a grassy area in the
middle. I keep the resource tables against the walls and the racks/smelters etc. in the
middle. I have a few crates there as well so I don't always have to run to my storage
building to get more resources.
Efficient Farming/Scavenging
So, you've probably gotten your ass kicked a few times while out for resources, and either died or
ran home nearly empty-handed. How can this be prevented? Good prep is key.
First, you need to know that there are only five places really worth scavenging at the start: the
green forest, yellow quarry, aid boxes/supply drops, plane crashes and Bunker Alfa [sic]. You might
think: why not the green quarry, or yellow forest, or the red ones? When you start off, you'll need
wood way more than stone, so going to the quarry makes little sense. The green forest also holds a
few rocks to dig out, usually enough for you to bring home 20-40 stone anyway. By the time you'll
really need a lot of stone, you'll also need a lot of iron. The green quarry holds little iron, not worth
the waste of time and/or energy. The yellow quarry holds more iron than stone, but because you'll
need to go back to the green forest frequently anyway and will bring back stone from that too, the
iron-to-stone ratio evens out. The yellow forest is just pointless, because the enemies are much
tougher and there are actually FEWER trees there than in the green forest. The only upside of the
yellow forest is that the supply crates there have a higher chance of producing a gun. Either one of
the red zones are just too dangerous right now. You'll definitely run into The Big One, a very fast,
huge zombie that WILL kill you in a single hit. If you want to try one anyway, I'd suggest the red
quarry because it's rumored you can collect aluminum there, a resource sorely needed for midgame construction.
When you're just starting off, you should only go to the green forest. The rest is way too tough, and
you'll likely lose more than you gain from going there. The only exception is if you see a plane
crash, which are very rare and hold tons of loot. You should use energy to go there fast though,
before other players start swarming in and kick your ass.
To enter the green forest I like to have the following on me: one decent weapon (see the section
on weapon appraisal) with more than half durability left, one set of clothing with more than half
durability left, a backpack, and a stack of preferably 20 food items in the secondary weapon/item
slot. That's all I take, so I have the maximum inventory space to bring stuff home. I DON'T make
any pickaxes or hatchets beforehand, as there are always enough resources on the ground to make
them on location. I make sure my health, hunger and thirst are all at ~100 before I leave, and that
I've taken a shower. You really don't need to bring water, as you'll usually find water bottles in one
of the loot crates in the forest, and you also can hydrate from eating berries. If you lack any or all
of the items mentioned above, you can still survive the green forest and come back with surplus
loot. You'll just have to be really careful, sneak a lot and be ready to run away if things get tough.
When I enter the area, I use the minimap to find enemies, sneak up on them and kill them until
I've cleared it out. If bodies drop loot, I pick it up immediately. I also open all loot crates I find in
the forest and take the stuff from it. If I happen to get mobbed by enemies and have to run, I'll at
least have that stuff to bring home then. Once the area is cleared and all the loot collected, I
choose one or more loot crates (depending on how much loot there is) and unload my inventory
(except for stuff I'll need in combat). It's very unlikely to get killed at this stage as long as you pay
attention to when players enter the area, so I feel safe leaving my loot behind.
Now, it's time to hit auto-mode. This will make your avatar once again collect all the resources on
the floor. This'll take a minute or two, and if you just make sure you are at 100 health when you
start off, you're unlikely to get killed if you take this time to go to the bathroom or make coffee or
something. Once all the stuff off the ground is picked up, your avatar will give pop-ups saying
“crafting gathering tool is required.” This is where you once again go to one of the loot crates, and
unload everything except combat necessities, stone and wood. Then you make a pickaxe and
hatchet, and press auto-mode again. It'll once again start collecting, this time from the trees and
rocks. If a tool breaks and your avatar needs a new one, it'll say “required gathering tool.” If you
open your inventory and either a hatchet or pickaxe is still there, that means the corresponding
resource is exhausted. You can make the tool for the other resource, hit auto-mode and your
avatar will continue collecting. Once he's done, he'll say “no resources to collect.”
Once everything is collected, I like to go into my inventory and delete all the pickaxes and hatchets
to make space. I eat all food and water sources I don't want to bring home, and then go to the loot
crates where I stashed stuff. I select what I want to bring with me, and then leave the area.
If you want to be able to successfully clear out the yellow quarry, you'd be smart to bring no
weapons weaker than a crowbar (17 damage) and wear a set of clothing in (near-)perfect
condition. A backup weapon is also advisable as there are LOTS of tough enemies.
Clearing Bunkers
If you happen to obtain a pass card and an access code from a dead soldier or your radio, you're all
set to enter a bunker. Right now, the bunkers are all in development and therefore you'll most
likely not be able to complete any of them. That doesn't mean Bunker Alfa [sic] isn't worth a go,
though. This one is getting updated all the time and is quite playable as of version v1.5.11
To enter the ground level of Bunker Alfa [sic] you'll only need a pass card for it. On this level, you'll
find a bunch of lockers with good equipment and even guns, and most likely very few to no
enemies. This alone is worth the trip, as guns are exceedingly rare still. If you're adventurous, you
can go down into the bunker via the terminal if you have the access code. On the 1st basement
level, you'll only find Fast Biters and maybe a Roaming Zombie or two, and these are all easy to
dispatch with or without good gear. If you brought a halfway decent weapon and some food for
healing, you'll survive. You won't find a ton of great loot, but if you're there anyway, you might as
well clear out this floor.
The second floor is where the rare parts for building vehicles can be found, as well as more good
weapons and other loot. It's EXTREMELY tough though. You'll get mobbed by Fast Biters, Toxic
Spitters, Toxic Abominations and Floater Bloaters, and will run into a Frenzied Giant as well. To
make it even worse, the access corridor to most of the good stuff is guarded by an automated
turret that'll shoot you to shreds, and can only be destroyed with firearms. To survive this floor
you'll likely need gear at tactical/kevlar/SWAT level, at least two fully loaded guns, heavy melee
weapons and lots of healing items. All this will still mean that you'll have to run away from a
Frenzied Giant, and keep shooting at him from a distance until he drops. It requires a lot of
dexterity, sneaking and a level head to survive this floor. Player Zed has reached and cleared the
third floor, which holds a lot of ration tickets and chopper parts. It's ill-advised to go there without
an automatic weapon, though, as you'll be swarmed by a LOT of heavy enemies.
Once a bunker is opened, it stays open for three days before it resets. The ground floor will always
remain the same enemy- and lootwise after that, but the basement levels will be reset with new
loot and enemies.
I would not advise anyone to go to Bunker Bravo yet, as you'll get mobbed by 20+ Fast Biters and a
Float Bloater right at the entrance, and it's unlikely to get better from there. Even a handgun will
not get you out of this hairy situation unless you're willing to spend 10 minutes running circles
around the bunker and healing all the time while slowly dispatching of the Fast Biters one by one.
If you happen to have automatic weapons and good armor, you should be able to clear it rather
easily.
You can't reach Bunker Charlie yet as it is on an island and will require you to complete vehicles. So
far only the chopper can be completed. I've not been able to test whether or not that will get you
to Bunker Charlie.
The dealer
“The dealer” is a special event opportunity that will summon an arms dealer in your vicinity for a
limited time. He will require a selection of random items for which you'll get a weapon/gear crate
in return. Unfortunately, as the dealer is on a timer you'll usually need to spend energy to get there
in time. Even more unfortunately, you'll never know what he'll need from you until you go there,
meaning that you'll have to go back-and-forth to your base AGAIN to finish the deal. As I play F2P
(free to play) I never bother with the dealer unless I'm at (nearly) full energy and he spawned close
to my base.
It is totally worth going to him when you can (once you've built up a good stockpile of various
items) because the trades are usually worth it. You can find a list of known trades at http://lastday-on-earth-survival.wikia.com/wiki/Dealer
As mentioned before, the CB radio is supposed to be able to summon the dealer for trading on
both Android and iOS. Unfortunately, on iOS the CB radio only gives you bunker codes.
Weapons, Items and Resources
There's so much you could take home to your base, how do you decide what matters? You can
figure this out through a process of trial and error, but I've made a list of the most common stuff to
help you get started. Please keep in mind that these lists are to appraise each item's worth
individually. You'll still need to keep at least a small stock of every type of item and resource (not
weapons or gear) for trading opportunities with the dealer.
Let's start off with craftable melee weapons:
Spear – Not very powerful but can be made at any time in the field, as it only requires three pine
logs. The 10 x 3 (sneak attack multiplier) = 30 damage will one-hit deer and almost kill wolves and
Roaming Zombies, making it useful enough for the green forest.
Makeshift Bat – With 14 x 3 = 42 sneak damage this weapon is the first one that can one-hit
wolves and Roaming Zombies. It's not really worth the resources unless you can't make anything
else though, as both planks and tape are useful for far more important weapons and other things
soon enough.
Torch – Total piece of crap. One less base damage than the makeshift bat, and totally not worth
the resources. Animal rawhides can be turned into leather which is very important for mid-game
weaponry, equipment and items in your base. Rope is necessary for making sets of clothes. Oh,
and have I mentioned that the damn torch BURNS OUT ON ITS OWN because it's a damn torch?
Iron Hatchet/Iron Pickaxe – Just don't. Not worth the resources at all, crappy weapons, auto-mode
will waste them on resources collecting while you can make pickaxes and hatchets in the field. The
only reason to have an Iron Hatchet is if you go out to raider the computer-generated “player
bases” around your base. Multiple Iron Hatchets are required to break down their wooden doors
and walls.
Bow – Kind of slow and difficult to aim, but a silent ranged weapon that can wreck weak enemies
all the same. Can be good in green areas if you can master the weapon.
Cleaver – 17 x 3 = 51 damage to start off when hitting an enemy with sneak, so pretty good.
Decent attack speed too. Unfortunately not very durable, and the resource cost is also a bit high,
especially if you consider the crowbar which you can build only a few levels after you unlock the
cleaver. Any weapon from this point on, including the cleaver, can seriously help you when trying
to get to plane crashes/supply crates/aid boxes though.
Crowbar – Same attack power as the cleaver but slightly faster and more durable. The first weapon
I'd consider sufficient to take on the yellow quarry.
Nail Board – More damage than the crowbar, but slower. 22 x 3 = 66 damage, so not good enough
to one-hit Fast Biters with sneak. Nails are also a ridiculously expensive resource, as you need to
convert one iron bar into one set of nails at the workbench.
Shovel – The perfect weapon for the yellow quarry. With its 27 x 3 = 81 attack power from sneak
you can one-hit Fast Biters, which are the vast majority of zombies in the yellow zones. You can
also chip off nearly 2/5th of a Floater Bloater's health if you successfully sneak-hit, making the rest
of the battle shorter and less taxing.
Spiked Devastator – Same damage as the shovel, but faster swing speed. Resource-wise not worth
it though, unless in crowded areas.
Skull Crusher – 45 damage, but really, really slow. Seems nicer than it is, especially for its cost.
Machete – 30 damage, 90 sneak damage, good durability. Just a beautiful piece for taking on the
tougher fights.
Saw Blade Mace – Slow but dealing 55 damage, so 165 on sneak-hit. They are expensive and not
very durable though, so you should use these only to sneak up on Floater Bloaters (or equally
heavy enemies) and proceed to kill them in under ten seconds. Maybe if some player jumps you in
full SWAT gear you might wanna pull this one out as well.
I have not yet attempted crafting guns, but even if so it's very unlikely I'll even be able to make the
zip gun anytime soon.
There are also a few melee weapons you can only find in the field. I have less exact stats on most
of them, but here's what I can tell you:
Hammer – Useless piece of crap. Can't even one-hit a deer on sneak with its crappy eight damage.
Marginally better than a spear when engaging another player in a slugfest, due to its high attack
speed. Dispose of all hammers unless you have nothing else.
Hockey Stick – Moderate weapon. Wouldn't take it to any yellow area.
Golf club – Solid weapon, I believe 17 damage. Useful in the same way as a cleaver.
Paddle – Slow, but 20 damage. Can one-hit most things in the green forest on sneak. I'd only use
this weapon in the green forest.
Baseball Bat – Good weapon. 20 Damage and fast. Usable in both green and yellow areas, as well
as special event drops and the 1st basement level of Bunker Alfa [sic].
Traffic Sign – Slow, but both strong and hilarious. Go whack some bitches.
Katana – Yes please, more of this please.
Now, on to resources:
Pine Log – There are never enough pine logs. (Re)building your house? Pine logs. Cooking food?
Pine logs. Smelting ore? Pine logs. Making planks for advanced construction? Pine logs. 'nuff said.
Stone – Very useful for making certain appliances at your base (like the smelters). Mid-game the
most important function of stone is to convert it into bricks, so you can upgrade you house's walls
and floors. This requires a LOT of bricks, so keep collecting.
Plant Fiber – Can be used for making basic boxes, clothes, can be converted into rope on the
tanning rack and into cloth with the sewing table. All around useful resource.
Carrot Seeds – Best reliable source for food combined with the garden beds. I make sure I have
about 60-80 in the back of my truck at all times. Carrots take a while to grow (one seed gives two
carrots every hour) but unless you completely suck at combat and need to heal excessively it'll still
be a steady food supply and making carrow stew with your cooking pots is your best early-to-midgame healing item.
Animal Rawhide – These can be converted into leather at the tanning rack, which you'll need a lot
of later on. Always bring these.
Raw Meat – When you start out, converting raw meat into steaks will suffice as a healing item and
to prevent going hungry. As soon as you can, switch over to producing jerky with the meat dryer.
It's a more cost-effective healing item and the dealer is known to ask for jerky.
Download LDoE Guide for v1.5.11
LDoE Guide for v1.5.11.pdf (PDF, 89.38 KB)
Download PDF
Share this file on social networks
Link to this page
Permanent link
Use the permanent link to the download page to share your document on Facebook, Twitter, LinkedIn, or directly with a contact by e-Mail, Messenger, Whatsapp, Line..
Short link
Use the short link to share your document on Twitter or by text message (SMS)
HTML Code
Copy the following HTML code to share your document on a Website or Blog
QR Code to this page

This file has been shared publicly by a user of PDF Archive.
Document ID: 0000677471.