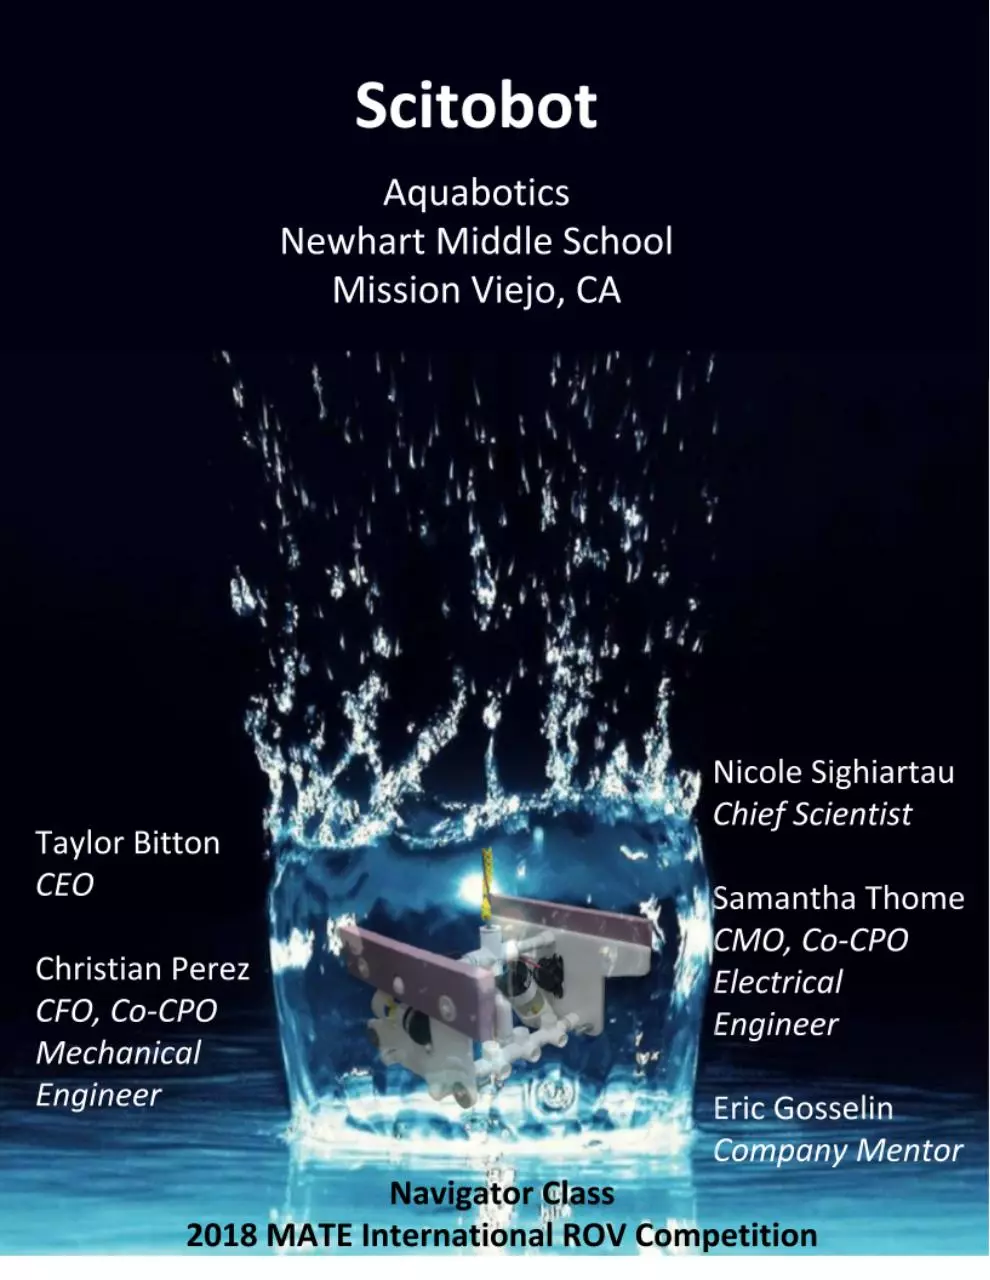
Technical Document Real Deal (23) (PDF)
File information
This PDF 1.5 document has been generated by / Skia/PDF m67, and has been sent on pdf-archive.com on 19/04/2018 at 08:47, from IP address 68.4.x.x.
The current document download page has been viewed 334 times.
File size: 2.51 MB (10 pages).
Privacy: public file


File preview
Table of Contents
Table of Contents....................................................................................................................1
1.0 Abstract..........................................................................................................................2
2.0 Company Information.....................................................................................................2
3.0 Design Rationale.............................................................................................................2
3.1 Design Philosophy.................................................................................................2
3.2 Components.........................................................................................................3
3.3 Orthographic........................................................................................................5
3.4 System Integration Diagram..................................................................................5
4.0 Budget............................................................................................................................6
4.1 Budget Summary..................................................................................................6
4.2 Financial Budget Sheet..........................................................................................6
5.0 Safety..............................................................................................................................6
5.1 Safety Features.....................................................................................................6
6.0 Experience......................................................................................................................7
6.1 Challenges............................................................................................................7
6.2 Future Improvements...........................................................................................7
6.3 Reflection.............................................................................................................8
7.0 Theme Analysis...............................................................................................................9
8.0 Acknowledgements.........................................................................................................9
9.0 References........................................................................................................................9
Page 1
1.0 Abstract
Aquabotics, a new company from Newhart Middle School, has accepted the
challenge in creating a Remotely Operated Vehicle (ROV) to respond to the tasks
proposed by Marine Advanced Technology Education Center. Aquabotics has been
perfecting their product, Scitobot, for weeks and is prepared to demonstrate its skills.
Complete with custom manipulators designed to perform the toughest of tasks and
smooth controls used for maneuvering, Scitobot is an advanced ROV from a rookie
team.
Long hours, determination, budgeting, and a drive to do the best job possible,
has pushed Aquabotics to the point they are now.
2.0 Company Information
A product is only as good as the company behind it. As a company, Aquabotics is
a hardworking team who have learned to collaborate and work together as a group. We
have lots of fun, but we get our work done. We are all seventh graders at Newhart
middle School. The following are the four members of our company:
3.0 Design Rationale
3.1 Design Philosophy
When making our ROV, we didn’t have access to top notch supplies necessarily, but we
did our best with what we had. We tried our best to keep everything simple and compact so
our product would be successful.
Simplicity is key in engineering. We knew as soon as we started building our frame not
to overthink things, because sometimes, the simple solution is the best solution. Using this
information, we built our frame. One thing that we did take time to do was keeping our ROV
symmetrical. This would ensure that the center of pressure and the center of mass was as close
to the middle of our ROV as possible.
Page 2
The frame also had to be as small as possible to allow the ROV to maneuver
through possible tight spaces without getting caught on anything. We didn’t put any
of our thrusters or manipulators too far outside our frame.
Once everything was built, we continuously tested and adjusted all aspects of the
vehicle until it was up to our standards and competition ready.
3.2 Components
● Frame: Scitobot’s frame is a very straightforward design. The base has a bar in the front
for manipulator connectors and a bar in the back to keep everything symmetrical. The
side panels are made of high density polyethylene which is neutrally buoyant and
shapes our whole ROV design. Additionally, it has cutouts in the sides for our starboard
and port motors. On the top of the ROV is a final bar to just keep everything sturdy and
serve as a connecting point for the tether. The ROV frame is mainly constructed of ½
inch PVC pipe.
○ Build: Our frame is basically our whole ROV, so we wanted it to be unique to us.
It would also be much cheaper to create our very own design for our ROV so it
could work with our specific needs.
● Tether: All of the power is sent to the motors through wires inside a 10 meter long
hollow braided polypropylene rope. Flotation in the form of pool noodles is duct taped
on throughout the tether. The camera cord is wrapped around the outside of the tether
and waterproofed by covering the exposed metal on the connected ends with hot glue.
To complete the waterproofing, we used heat-shrinking wrap and secured it with a heat
gun.
○ Buy: To build the tether would include braiding and tying 10 meters worth of
plastic which would be time consuming and pretty much useless. It’s much more
convenient to buy this from a store and insert our wires.
● Thrusters: When we placed our four thrusters, Aquabotics took careful thought to put
them in places where they would be beneficial. We wanted our port and starboard
thrusters centered vertically but as far to the sides of the ROV as possible to allow
maximum control. We placed the vertical thrusters as close to the exact center of the
ROV as possible so everything would be stable. To save time, we bought all of the
thrusters waterproofed.
○ Buy: Once again, to build our own thrusters would be a complete waste of time
when our Mentor already had a boxful of thrusters that previous teams had
used. The placement and wiring of these thrusters was entirely our own, but the
Page 3
thrusters themselves were bought for our school’s robotics teams to
use year after year. We did put the cowlings on the thrusters
ourselves.
● Camera: The camera is located at the front-center point of the ROV so our company can
see any task ahead of us. Similarly to our thruster purchase, the camera we bought was
waterproofed when we bought it.
○ Buy: The cameras were bought for similar reasons as above. We already had
them provided and it just made more sense. But again, we wired the camera,
mounted it in PVC pipe, and placed it ourselves.
● Buoyancy and Ballast: We didn’t want to have our ROV sink like a rock or float to the
surface. If it did, it wouldn’t be able to complete all the tasks it was assigned to do. Our
company had a plan to keep our ROV as close to neutrally buoyant as possible. We
achieved this using high-density polyurethane foam as flotation and washers and rebar
as ballast. To find out how much of these materials to install took calculations of
volume, mass, and density of our ROV.
○ Buy: Both the polyurethane foam and the washers were smart purchases as they
fit nicely with the ROV and serve their purpose very well. The foam won’t
compress that much under higher pressure, and the washers could be added and
removed easily so we could get the exact amount of ballast we wanted. This
makes it easy to get everything close to neutrally buoyant.
● Manipulators: Scitobot is made with a total of four manipulators, all slightly different
and useful in different ways. The first manipulator is a hook shaped design made from
high density polyethylene. It’s purpose is mainly to hold items we bring up to the
surface and items that we place on the pool floor from the surface. It can also be used
to close things such as the Communications Hub hatch. The next manipulator is also
made from high density polyethylene but is y-shaped rather than having one hook. This
serves a purpose of pushing things and can even be used to rotate things such as the
handle on the OBS. The third manipulator that we have created has only one use, but an
important one. During the energy task when our company must place a mooring a given
distance from the tidal turbine, we must measure the exact distance from the turbine.
This manipulator is a miniature measuring tape that stretches to 2 meters. After adding
on flotation to make it neutrally buoyant and a longer hook at the end, we can very
easily hook the end of the tape to the prop and move the ROV back to the given
distance. Finally, the last manipulator is a simple piece with a 90-degree elbow
Page 4
connected to a ½ inch coupler. When a clear cable is attached to both the
manipulator and the pump on deck, the airbag in the energy task can be
lifted. Together, these manipulators work as one to complete every task necessary in
the demonstration. They offer variety, originality, and creativity to Scitobot.
○ Build: Just like with the frame, the manipulators make Scitobot our ROV with its
own special features. They enable us to complete the given tasks in the
demonstration. We designed the manipulators out of cardboard first, them used
that as a guide to cut them out of high density polyethylene. We mounted the
manipulators in PVC pipe so we could attach them to our ROV. For the tape
measure manipulator, we attached a longer metal piece to the hook at the end
of the tape measure and used hot glue to mount the tape measure onto our
ROV.
● Electrical Control System: The main portion of the electrical is on deck enclosed in a
case. The wires inside the case are connected to one of the two joysticks (depending on
whether they are to be connected to the vertical motors or port and starboard motors)
and run through the umbilical cord to the specific motors on the ROV. Sabertooths are
in place in order to send the data from the joysticks to the motors. There are also wires
for camera that come from the camera onboard the ROV to the monitor and to the
camera filter where it receives power. We use an Amp Meter to be sure that we don’t
blow any fuses.
○ Build and Buy: For the electrical, we bought the saberteeth, joysticks, wires, and
protective case, but we assembled and connected everything ourselves. To have
somebody else put together our electrical would ruin any chance of a learning
opportunity. By doing it ourselves, we understood the electrical which also
makes it easier to present.
3.3 Orthographic:
For larger version of Orthographic, click HERE
3.4 System Integration Diagram:
For larger version of SID, click H
ERE
Page 5
4.0 Budget
4.1 Budget Summary
For our company, budgeting isn’t just a financial calculation, but how we scheduled
ourselves during the time leading up to the competition. We took care to do everything in a
timely matter to leave us time for testing and adjusting. We scheduled ourselves and made sure
that everyone had a job at all times to make sure we used our time as well as we possibly could.
As for our financial budgeting, all of our money and materials used in the competition
were graciously donated by our Company Mentor who collects supplies and funds so his
robotics class can compete each year. However, since this wasn’t our own money to spend, we
had to be even more careful to use everything we had to the best of our ability as not to waste
our Mentor’s money. Since our school has competed in the MATE competition before, many of
our materials were used in previous years. This left us a lot of materials to build with, but
sometimes it was still essential to buy what we needed.
4.2 Financial Budget Sheet
For larger version of Budget, click H
ERE
5.0 Safety
5.1 Safety Features
Aquabotics members all agree
that safety is not just
something we have to do but
something we should always
do without question. To fulfill
every requirement on the
MATE checklist, our company
did several things.
We waterproofed all of our
materials that were to be
submerged including thrusters,
camera, and our tether wires.
We bought the thrusters and
camera waterproofed to save
time. To waterproof the wires
we covered the connected
ends that had exposed metal
with hot glue. Then we used a
Page 6
heat-shrinking wrap for insulation and secured it with a heat gun.
Another safety precaution we took was sanding down all of our zip ties and
high density polyethylene to the point where they are soft to touch.
In regards to the electrical, we put in place an Amp Meter and fuse. The purpose is the
fuse is to act as a “weak link” in the event of a short circuit. If something ever goes wrong with
our electrical system, the fuse will blow and keep the rest of the electrical intact. However, the
fuse can only hold so much amperage as it is. We can only have 15 amps running through our
system at once. The Amp Meter measures this so we can ensure that we keep in the safe range
of amperage.
Basically, we smoothed anything sharp and added extra features to make sure
everything is perfectly safe with Scitobot.
6.0 Experience
6.1 Challenges
Even though overall, the building of Scitobot went pretty smoothly, Aquabotics ran into
a few speed bumps along the way.
Our camera was something we just constantly struggled with. For some reason, we just
could not get it right. As soon as our camera was plugged in, we saw that everything was
backwards on the monitor. We had to buy a completely new camera and start over with that
wiring. Then once that was finally done, we went to wrap our camera cord around the tether.
However, the camera cord was 15 feet instead of 15 meters. We had to undo everything and
buy a new camera cord. The final time we tested our camera, we were sure everything was
right. But this time we realized we had wired everything backwards and had to restart on
everything we did. Lesson learned; we will check our work very closely next time and never
make these mistakes again.
Another challenge was, of course, time. Since we did this whole project in class, we had
to work with only the time we were given. This made it hard and forced us to take advantage of
our time as well as we could.
6.2 Future Improvements
This will be added in after we have tested and troubleshot our ROV.
6.3 Reflection
Overall, this experience was eye-opening and meant a lot to our company. We learned
to appreciate and understand the art of engineering. In addition, we have become closer as a
team. All of us agree that being part of the MATE competition has been a great opportunity.
Page 7
7.0 Theme Analysis
Many underwater rovers have been developed to assist scientists and engineers in tasks
relating to earthquake monitoring and research, aircraft recovery, tidal turbine installation, and
habitat restoration and monitoring. These tasks are extremely important in creating a safer and
greener world.
The first application of ROVs is earthquake research. The main use of ROVs in
earthquake research is laying cables on the seafloor. These cables are used to connect multiple
instruments like seismometers, tiltmeters, and early warning accelerometers to a power hub.
Many organizations will use ROVs to install and repair these systems because the complex
networks are located as far down as 1300 meters; too deep for humans to dive and too delicate
for submarines to handle. As an example, Ocean Networks Canada used two ROVs, two large
ships, and two mud mats to maintenance a earthquake monitoring network off the coast of
Vancouver Island. Missions like these can happen very regularly near places with frequent
seismic activity. To summarize, a big application of ROVs is maintenance and installation of
earthquake monitoring systems.
The next real world application of underwater rovers is in aircraft recovery. Since the
beginning of aviation, countless flights have gone missing and have never been recovered. With
the use of modern technology in the form of an ROV, these planes can now be identified and
recovered. Sonar systems and underwater cameras onboard ROVs help piloting teams locate
crashed aircraft. Locating missing planes is beneficial because when the plane is recovered, the
flight recorder can be analyzed and the cause of the crash may be determined. The data
collected from crash sites can be used to better future aviation technologies, making planes
safer. In conclusion, ROVs can be used to identify, recover, and collect data from aircraft crash
sites.
Another application of ROVs is installing and maintaining tidal turbines. Tidal turbines
are a type of machine used for harnessing renewable energy. Similar to wind turbines, tidal
turbines convert the vertical movement of the tides into electricity. Tidal turbines are used
today as a clean source of renewable energy. ROVs are particularly useful for installing turbines
because of the challenging environments in which tidal turbines are usually installed. Turbines
are installed in areas where tidal activity is the strongest so powerful vehicles are needed for
their installation. Though water where turbines are installed is usually quite shallow, high wave
action makes it almost impossible for a diver to do the installment. That makes an advanced
ROV with powerful thrusters the perfect candidate for this important job. To conclude, ROVs
do the crucial job of installing tidal turbines, a great source of clean, renewable energy.
One last application of ROVs is habitat restoration and monitoring. Many national parks
or nature reserves are located in lakes or in the ocean and unlike terrestrial parks or reserves,
Page 8
Download Technical Document Real Deal (23)
Technical Document Real Deal (23).pdf (PDF, 2.51 MB)
Download PDF
Share this file on social networks
Link to this page
Permanent link
Use the permanent link to the download page to share your document on Facebook, Twitter, LinkedIn, or directly with a contact by e-Mail, Messenger, Whatsapp, Line..
Short link
Use the short link to share your document on Twitter or by text message (SMS)
HTML Code
Copy the following HTML code to share your document on a Website or Blog
QR Code to this page

This file has been shared publicly by a user of PDF Archive.
Document ID: 0000758458.