undercutwigtutorial (PDF)
File information
Author: JP Prims
This PDF 1.5 document has been generated by Microsoft® Word 2016, and has been sent on pdf-archive.com on 22/12/2016 at 07:25, from IP address 24.43.x.x.
The current document download page has been viewed 371 times.
File size: 1.05 MB (9 pages).
Privacy: public file


File preview
Undercut Wigs
So there are about a billion ways to do this, but here’s how I went about it. This technique takes a LOT of
time and trial and error, but in my opinion it’s seriously worth it. This took me about 5 months to finish
(though it was my first time ventilating a wig. Once I got the hang of it things sped up.)
First things first: Materials.
Materials:
- One wig in your base color. For Uta’s wig I ended up going with Arda’s Buttercup in black.
- One pack of short wefts in the color you want your undercut to be. (In Uta’s case, I just got black
again.)
- One ventilating needle. (Mine was 3-4 strands. It doesn’t matter what you do.)
- Wig lace in a color that approximates your skin tone.
- A thin, stretchy knit fabric. In this case I picked grey, but it doesn’t have to be.
- A needle.
- A small embroidery hoop.
- Thread in the same color as your knit fabric.
- A wig head.
Step 1: Cut down your wig.
This part is going to be hard for all of you who’ve been styling wigs for a long time. Hell, it was hard for
me. Mentally- not in terms of difficulty.
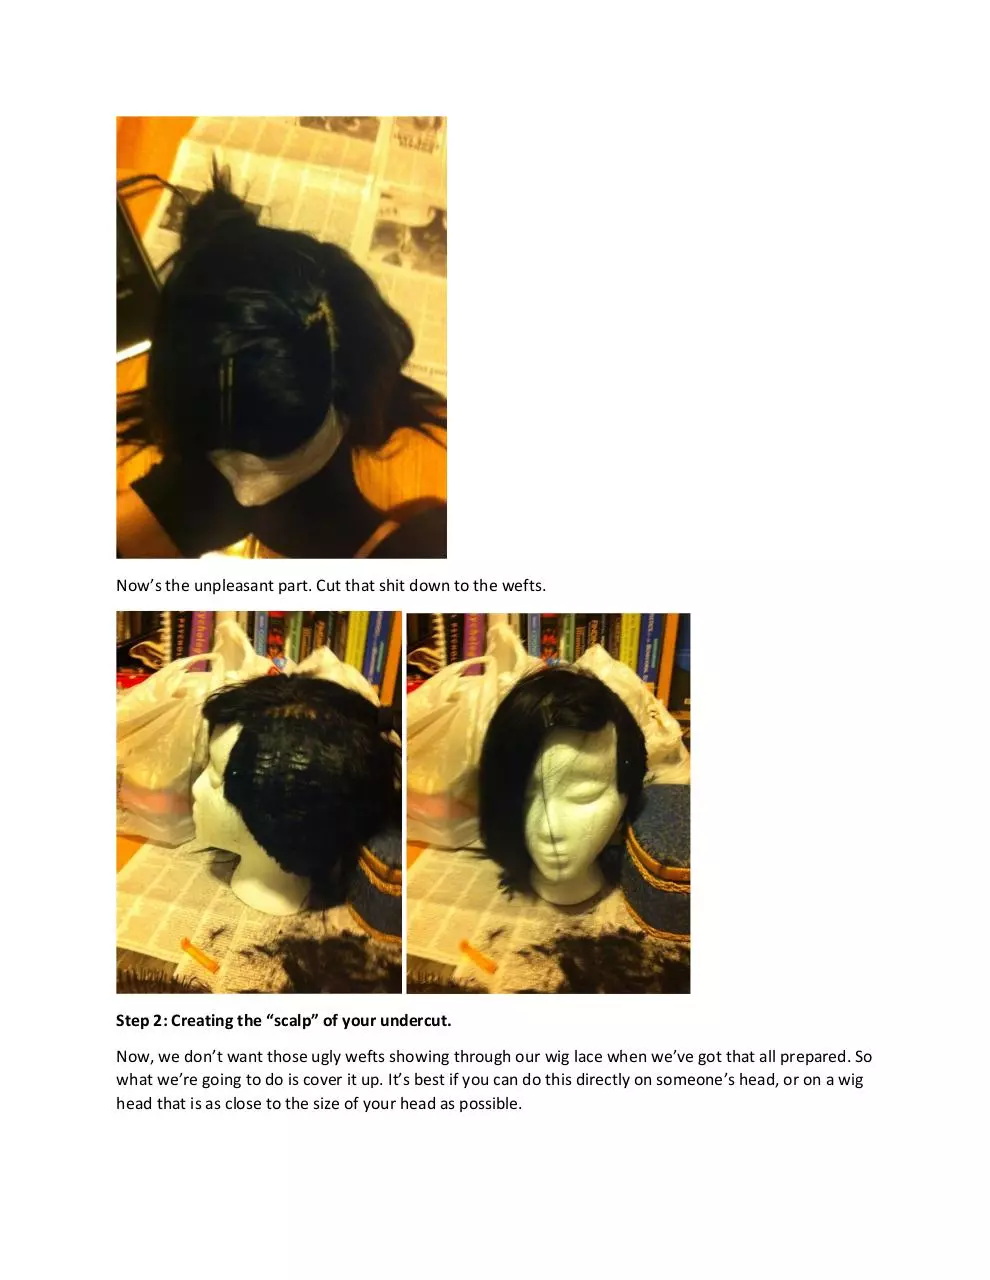
First pin all of the hair you want to keep out of the way. Isolate the spot where you want your undercut.
Now’s the unpleasant part. Cut that shit down to the wefts.
Step 2: Creating the “scalp” of your undercut.
Now, we don’t want those ugly wefts showing through our wig lace when we’ve got that all prepared. So
what we’re going to do is cover it up. It’s best if you can do this directly on someone’s head, or on a wig
head that is as close to the size of your head as possible.
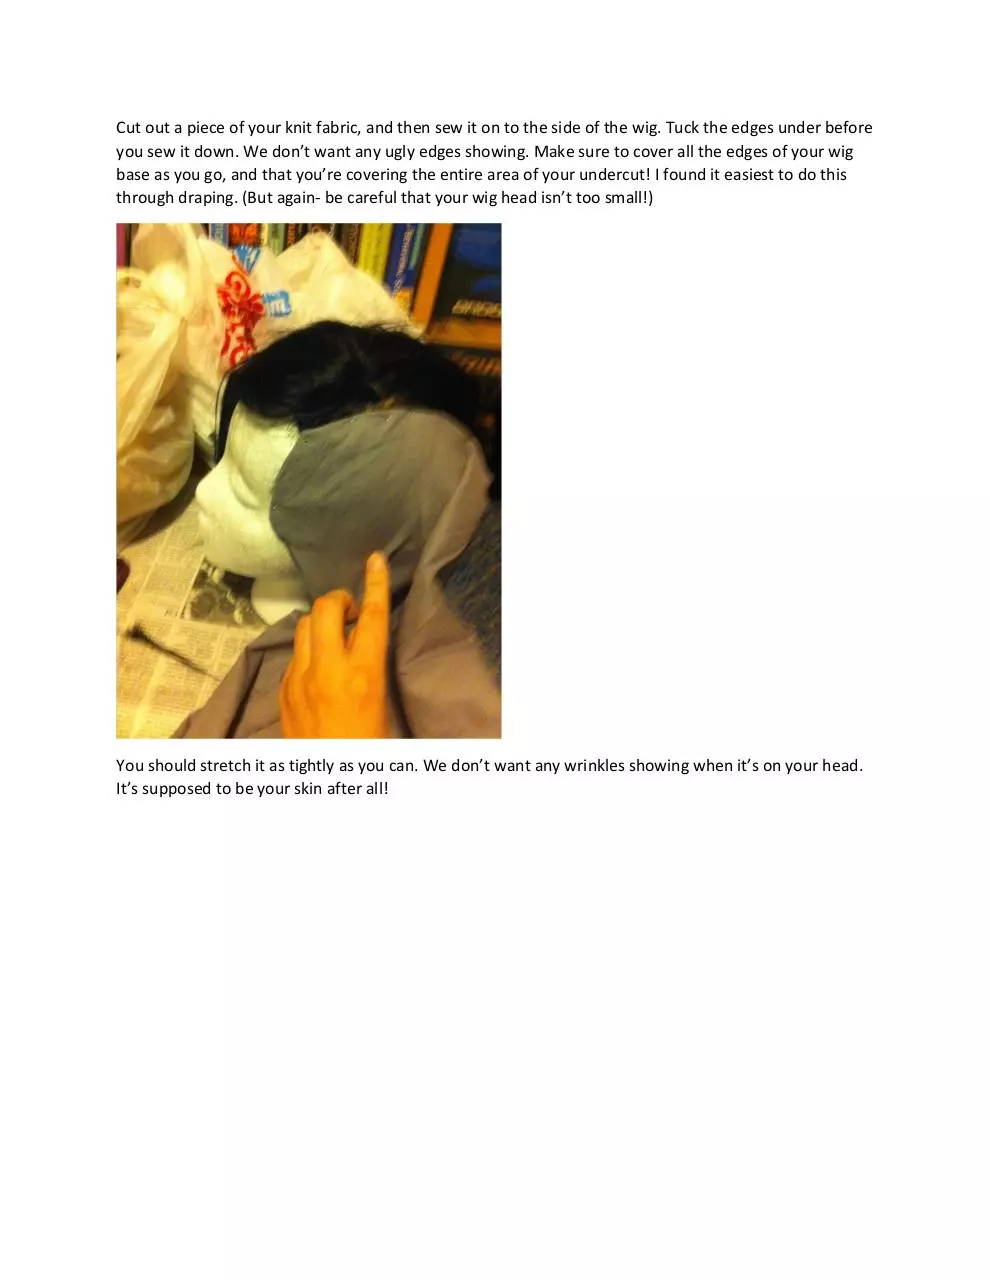
Cut out a piece of your knit fabric, and then sew it on to the side of the wig. Tuck the edges under before
you sew it down. We don’t want any ugly edges showing. Make sure to cover all the edges of your wig
base as you go, and that you’re covering the entire area of your undercut! I found it easiest to do this
through draping. (But again- be careful that your wig head isn’t too small!)
You should stretch it as tightly as you can. We don’t want any wrinkles showing when it’s on your head.
It’s supposed to be your skin after all!
Step 3: Getting hair for your buzz cut.
Here’s the part that takes a super long time.
We’re going to cut out a piece of wig lace that is several inches larger than the area of your uncercut on
every side. Like before, make sure it’s the area of the undercut WHILE YOU ARE WEARING THE WIG. This
is super important in this stage, because your wig lace does not stretch like your knit. It may tear if you
make it too small!
You can also do the next part by buying lace squares from Arda, but they might not be big enough or
nearly as cost-effective. (But if you’re in a hurry they’re a great option.)
But if you’re doing a piece as big as I did, it’s probably best to just… Slap that piece of wig lace in your
small embroidery hoop and start ventilating the hell outta it!
… And ventilating…
And ventilating….
AND VENTILATING- oh thank goodness we’re done.
Step 5: Actually doing the buzz cut.
Now pin that shit onto your wig over your knit. Make sure the wig lace covers all of the knit. Here’s the
trick: You want to pin down the bottom of the lace while it’s on something the same size of your head
and actually on your head. Like before, the knit will stretch. Your wig lace will not. We definitely don’t
want to tear that patch of hair we worked so long to create!
Now sew that in place! You don’t have to tuck the edges of this under. In fact, it’s good to let it go a little
past the hairline of the wig to make the transition from skin to buzz cut look more “natural.” (Like with a
ventilated hairline.)
And now… We cut! It won’t look pretty at first, but keep at it until you’ve hit your desired length.
And… Ta-da!
You’re free to do the rest of your styling. Your “buzz cut” is done!
Download undercutwigtutorial
undercutwigtutorial.pdf (PDF, 1.05 MB)
Download PDF
Share this file on social networks
Link to this page
Permanent link
Use the permanent link to the download page to share your document on Facebook, Twitter, LinkedIn, or directly with a contact by e-Mail, Messenger, Whatsapp, Line..
Short link
Use the short link to share your document on Twitter or by text message (SMS)
HTML Code
Copy the following HTML code to share your document on a Website or Blog
QR Code to this page

This file has been shared publicly by a user of PDF Archive.
Document ID: 0000525498.