Great Expectations Maternity Tunic Pattern (PDF)
File information
Author: DeJesus
This PDF 1.5 document has been generated by Microsoft® Word 2010, and has been sent on pdf-archive.com on 12/06/2018 at 00:41, from IP address 72.218.x.x.
The current document download page has been viewed 1308 times.
File size: 4.48 MB (22 pages).
Privacy: public file


File preview
Great Expectations Maternity Tunic
PDF pattern
Instructions:
– Before you print out your pattern, print a sample test page to make sure the pattern is scaled correctly. Your printer should
be set to “No scaling”, “Actual Size,” or “100%”. Do not select “Shrink to fit printable area.” The dashed outline for each
page should measure 7” wide by 9 ½” long. If the sizing is correct, go ahead and print the rest of the pattern. This pattern
has been designed for 8 ½” by 11” paper.
– Pages 4 and 5 (front yoke) should be connected along the center front line, unless you plan to cut your yoke on the fold.
The same goes for pages 6 and 7 (back yoke). Assembly for these pieces is somewhat different – just cut along the center
front line of each piece, align the pieces, and tape them together. The dashed lines on either side of the center front are to
help with aligning the pieces. Once they’re taped, trace or cut the yoke pieces as desired.
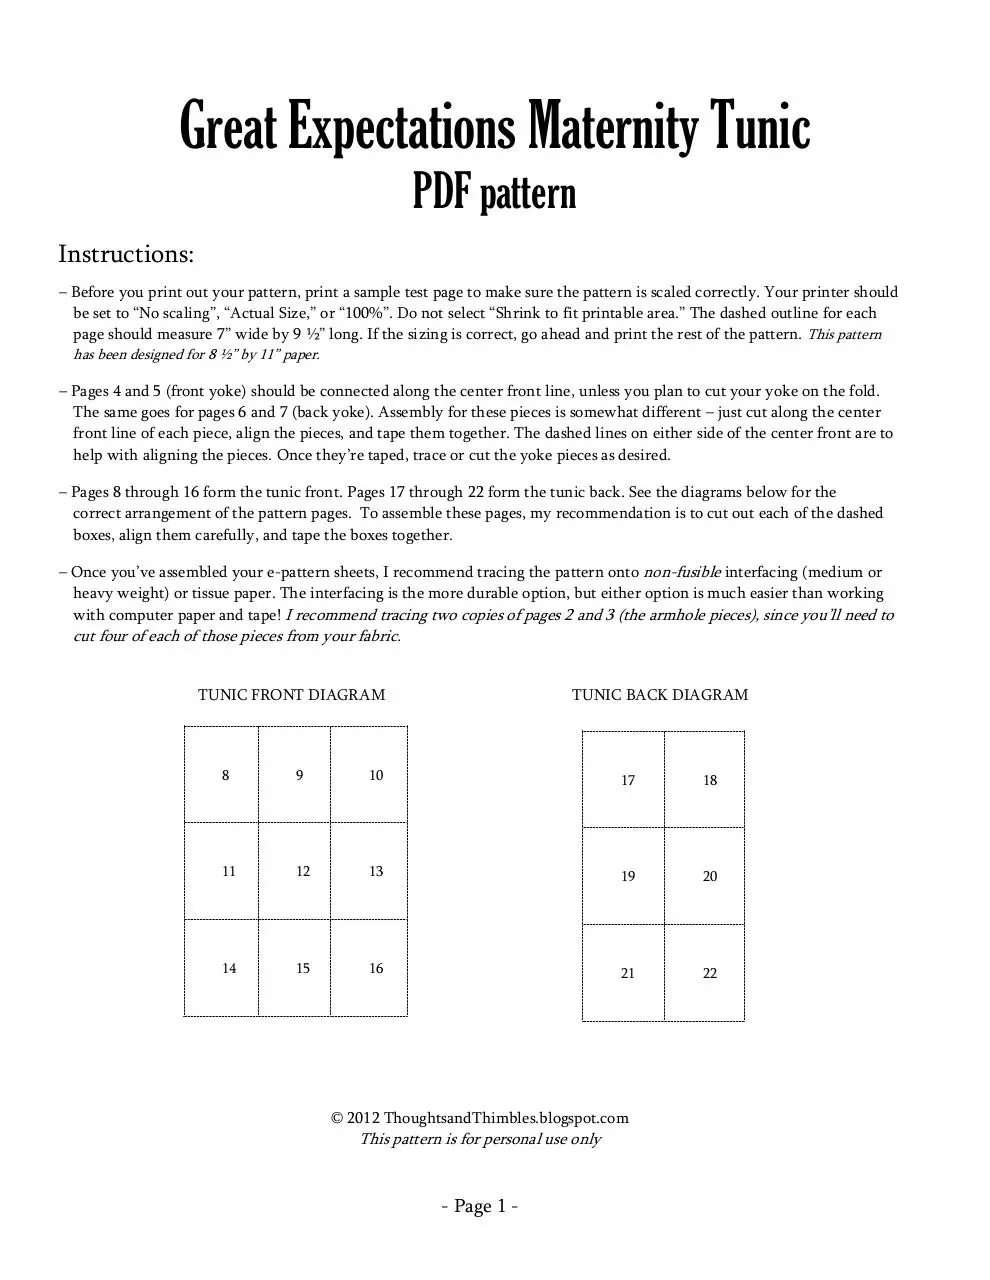
– Pages 8 through 16 form the tunic front. Pages 17 through 22 form the tunic back. See the diagrams below for the
correct arrangement of the pattern pages. To assemble these pages, my recommendation is to cut out each of the dashed
boxes, align them carefully, and tape the boxes together.
– Once you’ve assembled your e-pattern sheets, I recommend tracing the pattern onto non-fusible interfacing (medium or
heavy weight) or tissue paper. The interfacing is the more durable option, but either option is much easier than working
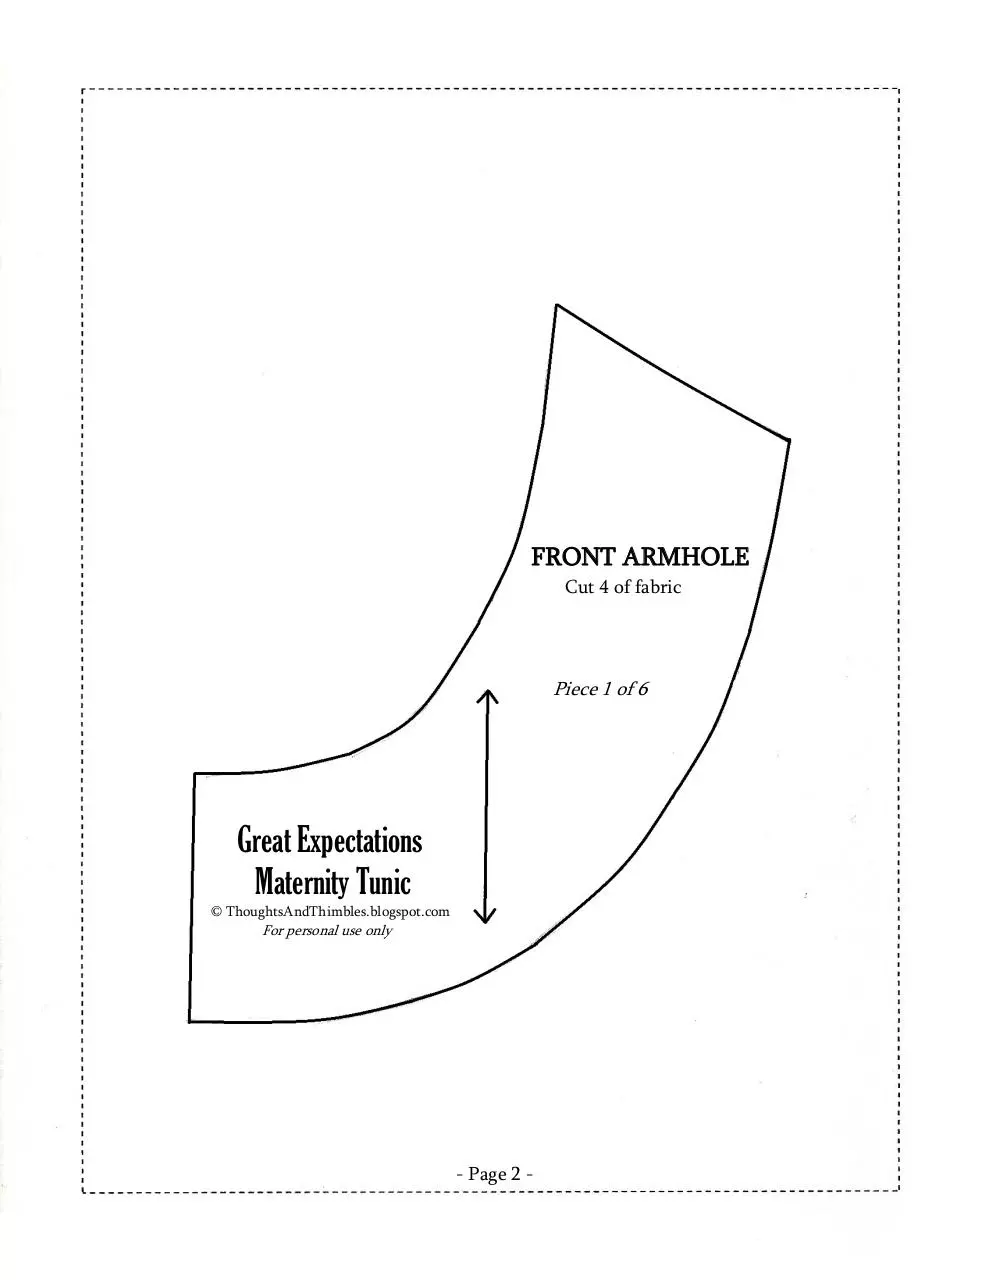
with computer paper and tape! I recommend tracing two copies of pages 2 and 3 (the armhole pieces), since you’ll need to
cut four of each of those pieces from your fabric.
TUNIC FRONT DIAGRAM
TUNIC BACK DIAGRAM
8
9
10
17
18
11
12
13
19
20
14
15
16
21
22
© 2012 ThoughtsandThimbles.blogspot.com
This pattern is for personal use only
- Page 1 -
FRONT ARMHOLE
Cut 4 of fabric
Piece 1 of 6
Great Expectations
Maternity Tunic
© ThoughtsAndThimbles.blogspot.com
For personal use only
- Page 2 -
BACK ARMHOLE
Cut 4 of fabric
Size S/M
Piece 2 of 6
Great Expectations
Maternity Tunic
© 2012 ThoughtsAndThimbles.blogspot.com
For personal use only
- Page 3 -
↑ CENTER FRONT
Great Expectations
Maternity Tunic
© 2012 ThoughtsAndThimbles.blogspot.com
For personal use only
FRONT YOKE
Cut 2 of fabric
↑
Size S/M
Armhole
Placement
Guides
Piece 3 of 6
↓
- Page 4 -
FRONT YOKE
PART 2
CONNECT WITH FRONT YOKE
↓ ALONG CENTER FRONT LINE
- Page 5 -
↑
Armhole
Placement
Guides
↓
Size S/M
Piece 4 of 6
Great Expectations
Maternity Tunic
© 2012 ThoughtsAndThimbles.blogspot.com
For personal use only
BACK YOKE
Cut 2 of fabric
↓
- Page 6 -
CENTER FRONT
CONNECT WITH BACK YOKE
ALONG CENTER BACK LINE
BACK YOKE
PART 2
- Page 7 -
↑
This Page Left Intentionally Blank
- Page 8 -
- Page 9 -
Download Great Expectations Maternity Tunic Pattern
Great Expectations Maternity Tunic Pattern.pdf (PDF, 4.48 MB)
Download PDF
Share this file on social networks
Link to this page
Permanent link
Use the permanent link to the download page to share your document on Facebook, Twitter, LinkedIn, or directly with a contact by e-Mail, Messenger, Whatsapp, Line..
Short link
Use the short link to share your document on Twitter or by text message (SMS)
HTML Code
Copy the following HTML code to share your document on a Website or Blog
QR Code to this page

This file has been shared publicly by a user of PDF Archive.
Document ID: 0001878901.