Thanks for buying this enclosure.
First a few thing about acrylic in this case Perspex.
It is strong but very brittle much more so than you would expect from its plastic like appearance. This means it is
easy to crack and split whilst drilling (if you want additional holes) unless you take some precautions.
The brittleness also means it is likely to shatter if you drop the enclosure on anything other than a mattress etc.
Once you know these things it helps a lot and acrylic is a long lived plastic that will serve its purpose for many years.
The enclosure pieces are quite sharp so take care when pushing together not to slip and maybe graze yourself with a
sharp edge. You may wish to smooth these edges once the case is assembled but most find it is not necessary.
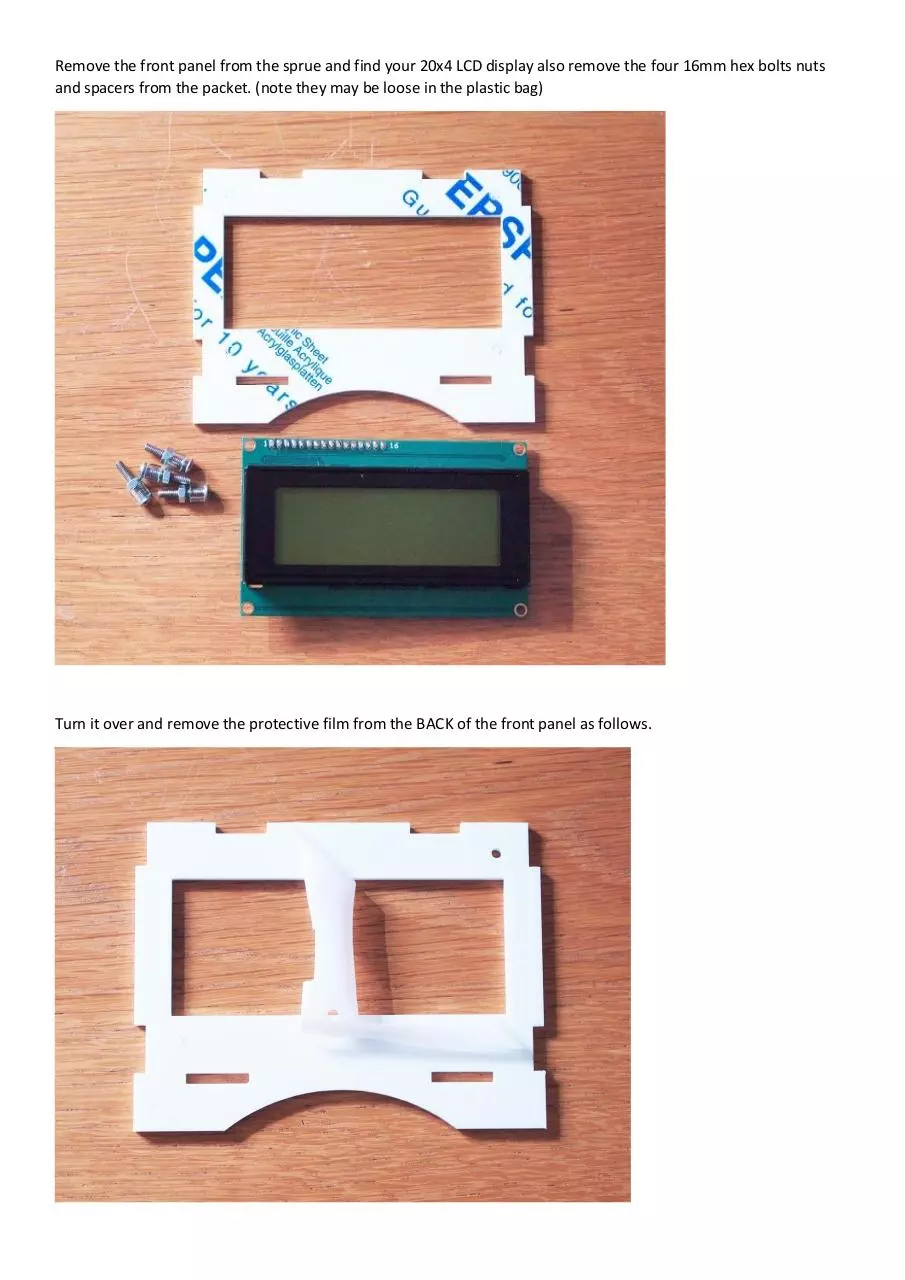
Remove all the pieces from the packaging.
This is what you should have.
�
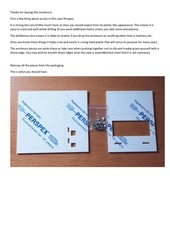
Remove the front panel from the sprue and find your 20x4 LCD display also remove the four 16mm hex bolts nuts
and spacers from the packet. (note they may be loose in the plastic bag)
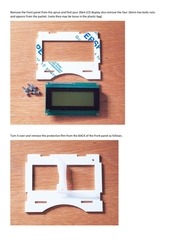
Turn it over and remove the protective film from the BACK of the front panel as follows.
�
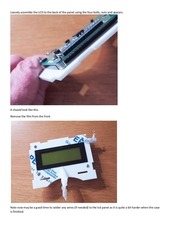
Loosely assemble the LCD to the back of the panel using the four bolts, nuts and spacers.
It should look like this.
Remove the film from the front
Note now may be a good time to solder any wires (if needed) to the lcd panel as it is quite a bit harder when the case
is finished.
�
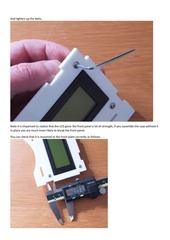
And tighten up the bolts.
Note it is important to realise that the LCD gives the front panel a lot of strength, if you assemble the case without it
in place you are much more likely to break the front panel.
You can check that it is mounted to the front plate correctly as follows.
�
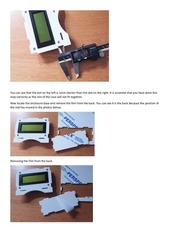
You can see that the slot on the left is 1mm shorter than the slot on the right. It is essential that you have done this
step correctly as the rest of the case will not fit together.
Now locate the enclosure base and remove the film from the back. You can see it is the back because the position of
the slot has moved in the photos below.
Removing the film from the back.
�
Peel the outside covering off the front edge and insert the tabs into the front plate. Note If you have removed the
film from both sides no worries just note the position of the slot and make sure yours is the same.
To fully engage the base you may need to use the edge of a hard surface as shown below. At this point you may as
well remove the rest of the film from the base.
�
Now locate the right hand side panel as viewed from the front (this is the one with the two holes in it) and remove it
from the sprue, and remove the film from the back.
Fit the side panel to the rest of the case there is an interference friction fit between the joints and you will have to
press the pieces together, again once you have engaged the edges using a hard surface to push against means you
are exerting the closing force evenly on the panel preventing bending etc. If you use your thumbs just do it evenly
again to avoid distorting the panel. Note if the panel does not fit check you have put the LCD on the correct side of
the front plate.
�
Repeat this procedure with the left hand side (the one with the cutouts).
Remove the film from the back
�
Push home and remove the outer film
�
 Historical archive . public document